
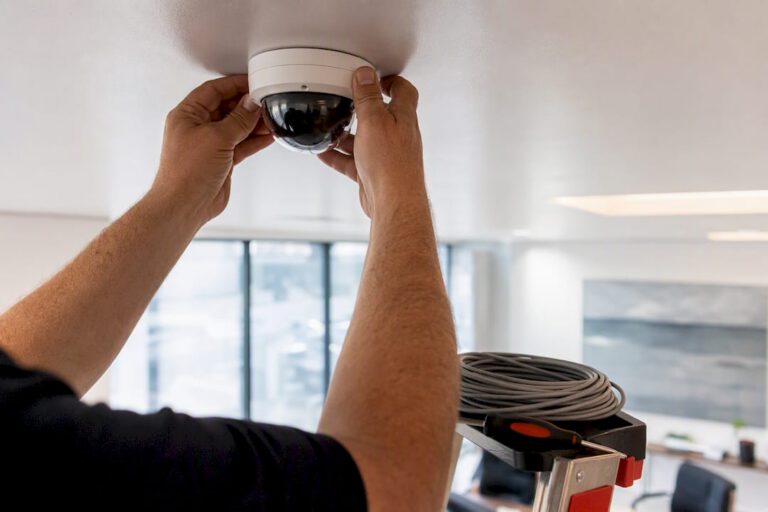
The best approach for most offices is a coverage-first system built on PoE IP cameras, a local network video recorder with cloud backup, and a professional site survey before anyone mounts a bracket. Skip the temptation to lead with camera specs. A 4K camera aimed at a blank wall catches nothing useful, while a properly placed 1080p unit at the front door catches everything that matters.
Before signing any proposal, run it through two quick checks. First, does it show actual camera placement, meaning mount heights and angles, not just a list of camera models? Second, does it spell out tamper protection and how long footage gets retained if the recorder itself is damaged or stolen? A vendor who can’t answer both on request hasn’t done the legwork yet.
Central Jersey Security Cameras builds proposals around a site survey first, camera selection second, which is the order that actually protects your business.
- Verdict: coverage-first PoE IP system, local NVR, cloud backup, professional survey
- Check one: placement shown with heights and angles
- Check two: tamper protection and backup retention spelled out
TL;DR:
- A site survey that accurately maps mount heights and angles is essential before selecting cameras, as placement outweighs resolution in effectiveness.
- The recommended sequence involves covering main entry points, corridors, lifts, and critical areas with a combination of wide overview and face-identification cameras.
- Combining local NVR storage with cloud backup ensures footage remains accessible even if the recorder is stolen or damaged.
- For night or high-contrast scenarios, infrared illumination and wide dynamic range processing improve image clarity without overspending on 4K resolution for all cameras.
- Professional installation focused on a site survey reduces future costs by avoiding blind spots and ensuring footage quality, with ongoing maintenance vital for system reliability.
Table of Contents
- Where to Place Office Security Cameras for Full Coverage
- Which Camera Types Actually Matter for an Office
- How Should You Handle Storage: NVR, Cloud, or Both?
- What Are Your Options for Monitoring and Alerts?
- What Should Professional Installation Include That DIY Skips?
- What Does an Office Camera System Typically Cost?
- How Often Should You Test and Maintain Your Camera System?
- How Central Jersey Security Cameras Approaches Office Installations
- Prioritize Coverage Before You Chase Specs
- Ready to Move From Planning to a Real Quote?
- Key Takeaways
- Sources
Where to Place Office Security Cameras for Full Coverage
Placement decides whether your footage is useful or just decorative. Get the site plan right and even a modest camera count covers the office; get it wrong and a dozen cameras still leave blind spots where incidents happen.
Six locations matter more than the rest: the main lobby and entry, the reception desk, main corridors, elevator and stairwell landings, the server or IT room, and any loading bay or parking area tied to the building. Everywhere else is optional depending on what the business actually needs to protect.
Mount height and angle aren’t guesswork. A placement guide from IP Security Depot recommends a primary lobby camera at a typical mount height and angled downward to cover faces appropriately, which balances a wide field of view against a usable angle on faces. A secondary identification camera mounted at a lower height to catch facial details catches the detail the wide shot misses. In corridors with standard 10 foot ceilings, plan an appropriate camera spacing to cover the length of a hallway without gaps. Stretch that spacing further and you create a gap where someone can walk the length of a hallway without appearing on camera at all.
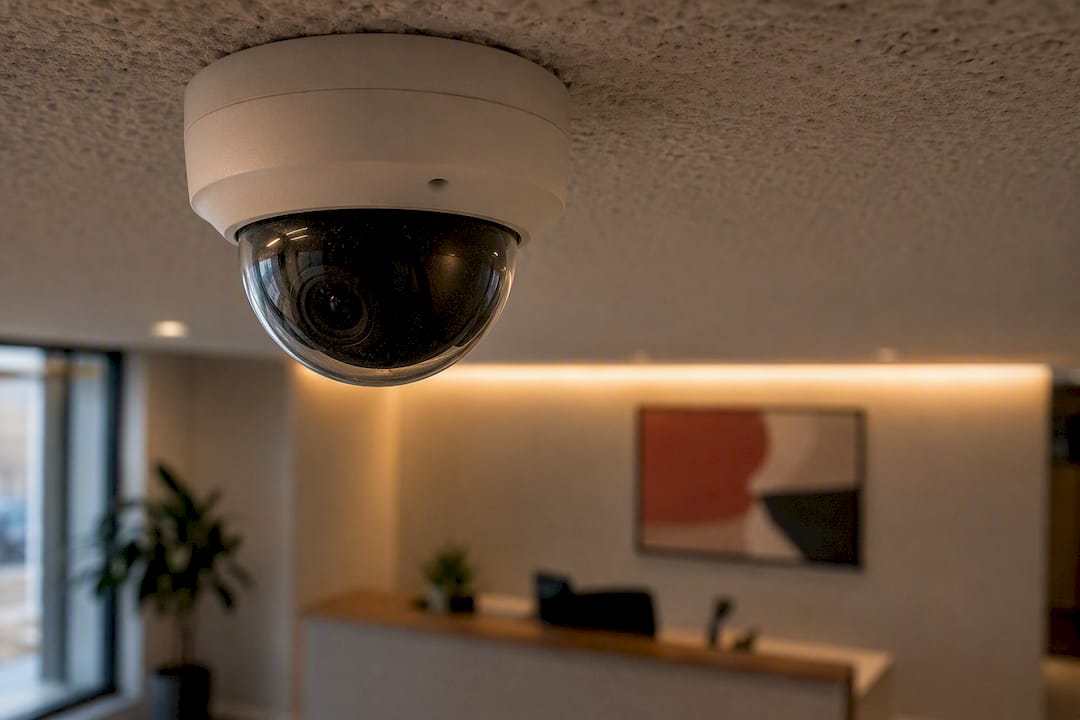
The two-camera lobby setup is worth the modest extra cost. One camera holds a wide overview of the whole entry, the second is fixed tighter for identification. That combination gives you both context (who came in, what direction, carrying what) and a usable face shot for identification, which a single wide-angle camera almost never delivers on its own.
Here’s the placement sequence that works for most office layouts:
- Cover the main entry with a wide overview camera at 10 to 12 feet.
- Add a lower identification camera near the same entry for face-level detail.
- Place a camera at every elevator lobby and stairwell landing, not just the ground floor.
- Space corridor cameras every 80 to 120 feet along main paths.
- Cover the server room door and any loading or parking area with exterior-rated units.
- Treat conference rooms carefully: a fisheye camera at the door or coverage of the corridor entry is usually enough without putting a lens inside a room where sensitive meetings happen.
Four mistakes show up constantly in office systems, and all four are avoidable at the planning stage. Backlit entries, where a camera faces a glass door with daylight streaming in behind whoever walks through, wash out faces into silhouettes. Cameras mounted perpendicular to a corridor capture people crossing the frame instead of walking toward the lens, which is nearly useless for identification. Elevator and stair landings get skipped constantly, even though placement work from Digital Solutions flags them as commonly overlooked yet critical to incident review. And private areas like restrooms or single-occupant offices get overcovered by installers padding a camera count instead of solving an actual risk.
Pro Tip: Walk your own lobby at the time of day with the worst sun glare before finalizing camera angles. If you can’t see faces clearly with your own eyes at that hour, the camera won’t either.
Which Camera Types Actually Matter for an Office
Form factor should follow the job, not the other way around. Dome cameras suit indoor ceiling mounts because the housing hides which direction the lens points, which itself deters tampering. Bullet cameras work better outdoors or in parking areas where a visible, weather-rated housing signals a real security presence. Fisheye cameras give a full-room overview from a single ceiling mount, handy for open floor plans or large conference rooms. PTZ, or pan-tilt-zoom, cameras earn their higher price in wide-open areas like parking lots or loading docks where an operator needs to zoom in on a specific vehicle or person after the fact.
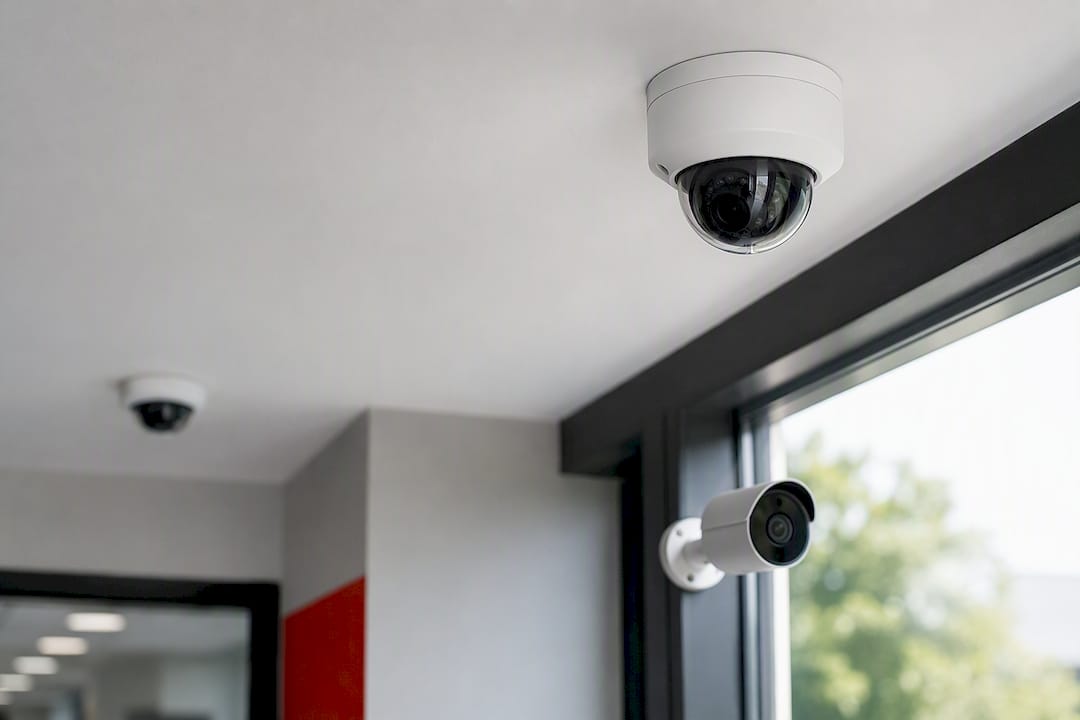
Resolution is where most vendors oversell. For general office coverage, 1080p is genuinely adequate, and research from SafeHome confirms that 4K only earns its keep when you need fine identification detail, such as reading a face at distance or capturing license plates in a parking area. Paying a 4K premium on every camera in the building when only your entry and lot cameras need that resolution is money better spent on a second camera somewhere else.
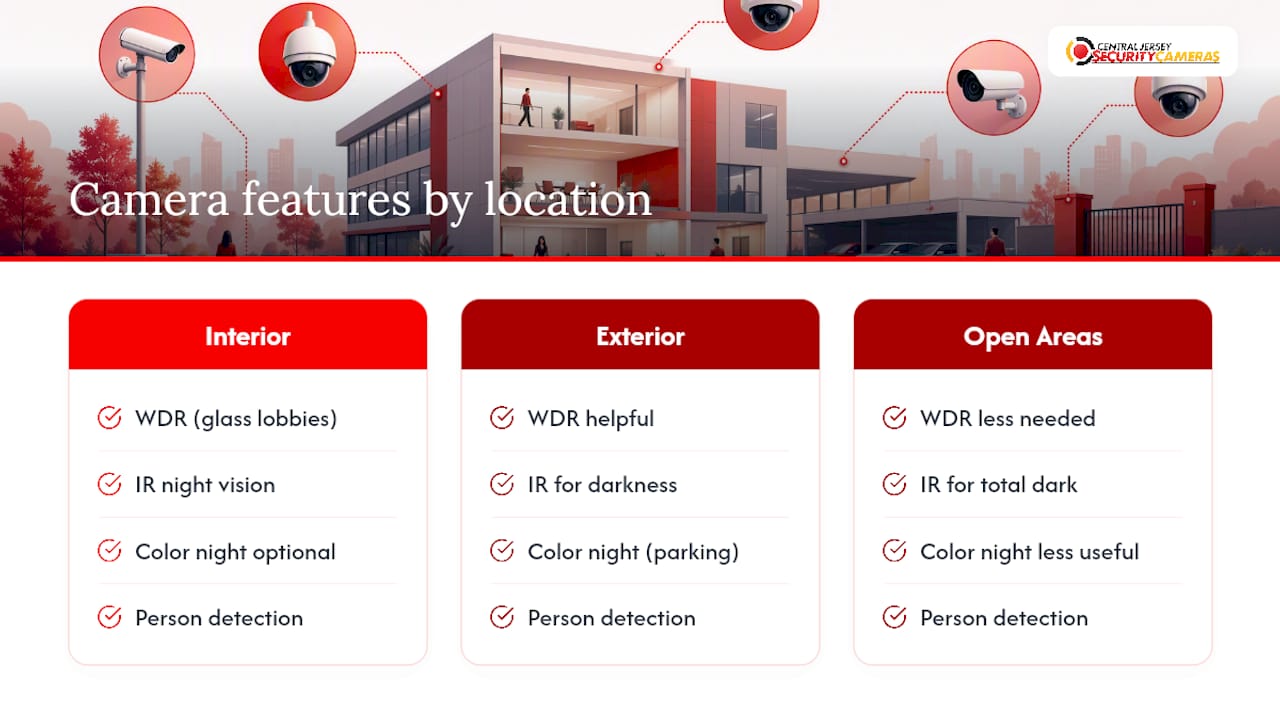
Glass-front lobbies create a specific problem: strong contrast between bright exterior light and a dim interior. Wide dynamic range, or WDR, processing handles that contrast so faces near the glass door don’t disappear into shadow. For night coverage, infrared illumination gives you clear black-and-white footage in total darkness, while color night vision needs some ambient light but preserves color detail useful for describing clothing or vehicles. Most offices benefit from IR on interior cameras and color night vision on exterior units where parking lot lighting is already present.
Analytics are worth paying for selectively. Person detection and line-crossing alerts cut down false alarms from blowing trash bags or passing headlights, which matters enormously once you’re relying on notifications rather than watching a monitor all day. Skip vague marketing claims like “smart AI security” with no specific feature behind them. One feature worth building in from day one: disable audio recording by default. It reduces wiretap exposure across multiple jurisdictions and simplifies your legal footing without costing you anything in video coverage.
How Should You Handle Storage: NVR, Cloud, or Both?
The network and storage architecture behind your cameras matters as much as the cameras themselves, and it’s the part vendors explain the least. A local PoE and NVR setup, meaning power-over-ethernet cameras feeding a network video recorder on-site, gives you full control over footage and no ongoing cloud fees. The tradeoff is exposure: if someone steals or damages the recorder, that footage is gone unless you’ve backed it up elsewhere.
That’s why a hybrid setup has become the practical default for offices. Running local NVR storage alongside cloud backup, or layering an AI monitoring overlay on top of existing IP cameras, preserves evidence even if the on-site recorder is compromised, according to guidance from Surveillant, while still giving you searchable alerts and after-hours person detection.
Retention math matters for budgeting. A typical 1080p camera recording continuously requires substantial storage over time, so a multi-camera office system planning for month-long retention needs multiple terabytes of local storage plus cloud backup options.
A few architecture decisions protect you long-term:
- Segment cameras onto their own VLAN, separate from office computers and guest Wi-Fi, so a compromised camera can’t become a doorway into your business network.
- Apply quality of service, or QoS, rules so video traffic doesn’t choke out everyday office bandwidth during business hours.
- Add cellular backup on the NVR or router where an internet outage would otherwise blind your whole system.
- Choose cameras and recorders that support ONVIF and RTSP standards, which keeps you from being locked into one manufacturer if you expand or switch monitoring software later.
What Are Your Options for Monitoring and Alerts?
Monitoring is the layer that decides whether your cameras actually stop something or just document it after the fact. In-house review, where someone on staff checks footage as needed, costs the least monthly but depends entirely on someone remembering to look. AI and cloud-based alerting flags motion or a detected person and sends a notification, cutting the false-positive noise that makes people ignore camera apps within a month of installation. Paid professional monitoring adds a live human watching for real-time response, at a real added monthly cost, and makes the most sense for offices holding cash, inventory, or after-hours access risk.
AI-driven cloud search speeds up investigations dramatically. Instead of scrubbing through hours of timeline, plain-English search lets you query footage for “person in red jacket near loading dock” and jump straight to the relevant clip, a capability that platforms like Surveillant build directly into their AI monitoring overlay.
If an incident ever escalates to police involvement or an HR investigation, expect to export clips in a standard format with an unaltered timestamp, and keep a simple log of who accessed or exported that footage and when. That log is your chain of custody, and courts and HR departments both care about it.
Monthly costs for monitoring services can vary widely depending on service level, from basic cloud plans to full professional monitoring with dispatch. If your office has spotty internet reliability, budget for cellular backup on the recorder; if you need to confirm an alarm event before dispatching anyone, video verification service is worth the added line item.
What Should Professional Installation Include That DIY Skips?
A real site survey covers ground a DIY install almost never does. A technician walks the property checking sightlines, existing cable routes, available power near mounting points, where the NVR itself will physically sit, and tamper protection for any camera within reach of the public. That survey is what catches the glare problem at your front door before it becomes six months of unusable lobby footage.
Installation deliverables should be tangible and checkable. Cabling routed neatly through conduit or above the ceiling grid rather than draped along a baseboard. A PoE switch sized correctly for your camera count plus headroom for future additions. Cameras labeled by location in the NVR software so nobody’s guessing which feed is which during an incident. And a baseline recording taken at handover so you have a clear reference point for image quality going forward.
Physical constraints trip up installers who skip the survey step. Drop ceilings hide cable runs but complicate mounting stability. HVAC vents create airflow that can shake a poorly mounted camera over time. Reflective glass throws glare exactly where you need clear identification footage. A technical walkthrough from HTech Knight points to exactly this kind of assessment as what prevents installations that look fine on day one and produce garbage footage by month three.
Before signing with any installer, ask these four questions:
- What warranty covers the hardware, and separately, what covers your labor?
- Is there a maintenance plan, and what’s the response time if a camera goes down?
- Is there a written service level agreement for support response?
- Will you get hands-on training on the system before the technician leaves?
Pro Tip: Ask for the baseline recording in writing as part of your handover package. It’s the single easiest way to prove image quality degraded later if you ever need to file a warranty claim.
What Does an Office Camera System Typically Cost?
Hardware costs scale with camera class more than anything else. A standard 1080p dome camera costs far less than a 4K PTZ unit, and housing rated for outdoor exposure adds to the price of every exterior camera on your list. The NVR itself scales with channel count and storage capacity, so a 32-channel recorder with several terabytes of drive space costs meaningfully more than an 8-channel unit built for a small suite.
Labor is the variable most quotes get wrong when compared apples to apples. The number of cable drops, the height of your ceilings, and whether conduit needs to be run through finished walls all move the installed price per camera. A single-floor office with drop ceilings and easy cable access installs faster and cheaper than a multi-floor building with finished ceilings and limited access points.
Beyond the upfront build, plan for three ongoing costs: monitoring fees if you choose a paid service, cloud storage fees if you’re backing up beyond local retention, and a maintenance or service contract covering firmware updates and hardware failures.
If budget is the constraint, a phased rollout beats stretching a full system thin. Cover the entry, lobby, and server room first, since those carry the highest risk, then expand to full corridor and parking coverage in a second phase once budget allows. Reserve a slice of that budget for network upgrades, since older office switches often can’t handle PoE loads for a dozen-plus cameras without an upgrade first.
How Often Should You Test and Maintain Your Camera System?
A camera system isn’t a install-and-forget purchase. Monthly checks should confirm every camera is online and recording. Quarterly, test image clarity, timestamp accuracy, and confirm your cloud or backup storage is actually capturing footage rather than silently failing. Once a year, walk the site again as if it were a new survey, since office layouts change, furniture gets moved, and a camera that had a clear line of sight last year might now be staring at a filing cabinet.
Four things deserve a hard look at every test cycle:
- Live view clarity across every camera, checked at both day and night settings.
- Timestamp accuracy on recorded footage, since a drifted clock undermines evidence value.
- Backup integrity, confirmed by actually restoring a clip rather than trusting the backup ran.
- Alert delivery, tested by triggering motion and confirming the notification actually arrives.
Firmware and network hygiene matter as much as the physical hardware. Change every default password on cameras and the NVR at installation, limit admin-level access to a small list of people, and use a VPN or a secure vendor portal for remote access rather than opening ports directly to the internet. A maintenance contract should spell out response time for a failed camera, how often firmware gets checked and updated, and whether that quarterly test cycle is included or billed separately.
How Central Jersey Security Cameras Approaches Office Installations
Central Jersey Security Cameras builds office systems around the same sequence outlined throughout this guide: site survey first, then camera selection, then installation, then ongoing service. Our scope covers IP and PoE camera installs, NVR setup and sizing, license plate recognition cameras for parking and loading areas, PTZ cameras for wide-area coverage, active deterrence cameras that respond to detected motion, and remote monitoring so you can check in from anywhere.
A system is only as good as the survey behind it. The cameras matter less than knowing exactly where the blind spots are before a single bracket goes on the wall.
The workflow moves from an on-site assessment of your entries, corridors, and risk areas, through camera and NVR selection matched to what that survey found, to installation with labeled cameras and a documented baseline recording, and finally to a maintenance plan that keeps the system reliable for years rather than months.
- Site survey and coverage plan before any hardware is selected
- Professional PoE and NVR installation with labeled cameras
- LPR, PTZ, and active deterrence options for higher-risk areas
- Remote monitoring and ongoing maintenance service
Offices that skip the professional survey step tend to pay for it twice: once for the initial install, and again when blind spots or unusable footage force a second round of camera repositioning within the first year.
Prioritize Coverage Before You Chase Specs
Most offices overspend on camera resolution and underspend on placement, and that’s backward. A well-placed 1080p camera at your front door beats a 4K camera pointed at an empty hallway every time. If your budget is tight, don’t try to cover the whole building at once. Pilot the entry, lobby, and server room first, live with that system for a month, then expand once you know it’s actually catching what you need it to catch.
If you’re evaluating vendors right now, the fastest way to separate a serious proposal from a template quote is to ask for a site survey before any camera model gets discussed. A commercial security installation that starts with your building’s actual layout instead of a standard package is the one worth signing.
— Tom
Ready to Move From Planning to a Real Quote?
If you’ve read this far, you already know more than most vendors will bother explaining on a first call. There are other paths, some businesses hire a general IT contractor to bolt on a few cameras, others buy a DIY kit and hope the placement works out. Central Jersey Security Cameras takes a different route: a real site survey by a technician who walks your building before recommending a single camera, so the system you get matches the risks you actually have instead of a generic package.
Our services for offices cover the full sequence: site survey, system design, PoE and NVR installation, license plate recognition and PTZ cameras for parking and loading areas, and ongoing remote monitoring and maintenance. A typical quote includes camera placement with mount heights and angles shown, a breakdown of installed cost per camera, and a realistic install timeline based on your building’s cabling and ceiling access.
We serve businesses across Central New Jersey, including Ocean, Monmouth, Middlesex, Mercer, and Burlington counties. If you’re ready to see what a professional survey turns up on your property, start with our security camera services page and request a quote built around your building, not a template.
Key Takeaways
The most reliable office surveillance systems prioritize a professional site survey and correct camera placement over chasing resolution specs or camera count.
| Point | Details |
|---|---|
| Lead with placement | A site survey showing mount heights and angles matters more than resolution specs on a proposal. |
| Use the two-camera lobby setup | Pair a wide overview camera with a lower identification camera at your main entry. |
| Choose hybrid storage | Local NVR plus cloud backup protects footage even if the recorder is stolen or damaged. |
| Disable audio by default | Turning off microphone recording reduces legal exposure across jurisdictions with no coverage loss. |
| Work with a local installer | Central Jersey Security Cameras builds office systems starting with a site survey, not a hardware catalog. |
Sources
- Office camera placement guide — IP Security Depot
- Surveillant — office security cameras (AI monitoring software)
- Office security camera placement done right — Digital Solutions