
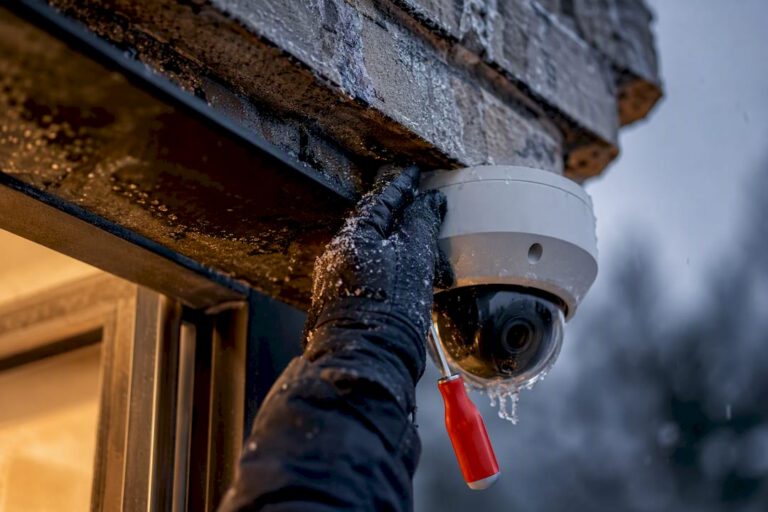
For reliable outdoor security, choose a camera rated at least IP65, with an operating range that covers your region’s actual winters and summers. If the mounting spot has power nearby, run wired or PoE power and keep footage local on an NVR. If it doesn’t, a solar-assisted battery camera works, but plan for winter charging limits. Everything else is a checklist problem, not a guessing game.
TL;DR:
- An outdoor security camera should have a minimum IP65 rating, with higher ratings like IP66 or IP67 preferred for areas exposed to driving rain or pressure washing.
- Mounting location and angle dramatically impact footage quality and reliability; avoid direct runoff and ensure proper Wi-Fi signal before installation.
- Power sources such as wired or PoE connections provide the most dependable operation in storms, while battery and solar cameras require careful winter recharging planning.
- Local storage options like NVRs or SD cards ensure footage recording during Wi-Fi outages, making them essential for reliable security during severe weather.
- Professional installation with weatherproof wiring, surge protection, and correct mounting drastically reduces common weather-related failures compared to DIY setups.
Table of Contents
- What Types of Weatherproof Outdoor Cameras Should You Consider?
- How Do You Read IP and IK Weatherproof Ratings?
- Which Power and Installation Option Holds Up Best in Wet Weather?
- Local Storage or Cloud: Which Handles Weather Disruptions Better?
- How Do Weatherproof Cameras Actually Perform in Extreme Weather?
- Where Should You Mount a Weatherproof Camera for the Best Results?
- What Does Year-Round Maintenance Actually Look Like?
- How Should You Choose and Budget for a Weatherproof System?
- What Do Professional Installers Fix That DIY Setups Usually Miss?
- An Editorial Take: Weatherproof Specs Are the Easy Part
- Get a Weatherproof System Installed Right the First Time
- Sources
- FAQ
What Types of Weatherproof Outdoor Cameras Should You Consider?
The camera shape you pick changes what it’s actually good at catching outside. A dome housing and a bullet camera can carry the same internals and still perform completely differently once rain, glare, or a would-be intruder gets involved.
- Bullet cameras are the cylindrical, obviously visible cameras mounted under eaves or on poles. Their long, narrow lens design is built for identification at distance, and the visible housing itself acts as a deterrent.
- Turret and dome cameras sit in a rounded housing that resists tampering better than a bullet body, since there’s less to grab, and the dome shape sheds rain more evenly across the lens.
- PTZ (pan-tilt-zoom) cameras cover wide areas like parking lots or warehouse yards, letting an operator or preset patrol pattern follow motion instead of relying on a fixed frame.
- Floodlight cameras combine bright LED lighting with detection, which is less about identification quality and more about active deterrence, since a sudden wash of light does more to spook a trespasser than a night-vision clip ever will.
- Doorbell cameras replace or sit alongside an existing doorbell, often drawing power from the doorbell wiring already in the wall. Consumer Reports notes this makes doorbell models a practical fit for front and back door monitoring specifically because you’re not fighting a power problem.
- Wire-free (battery) cameras go almost anywhere, including a shed roofline or a detached garage with no nearby outlet, at the cost of periodic recharging.
- Cellular cameras use a data connection instead of Wi-Fi, which matters for a barn, a remote gate, or a property with no broadband reach at all.
Match the category to the job, not the other way around. A driveway entrance wants identification quality (bullet or a license-plate-capable model), a backyard wants broad motion coverage (dome or PTZ), and an isolated equipment yard wants deterrence more than 4K detail (floodlight). Buying a beautiful dome camera for a spot that actually needs a floodlight’s shock value is a common, avoidable mistake.
How Do You Read IP and IK Weatherproof Ratings?
The rating on the box is a two-digit code, and most buyers only ever read half of it. An IP65 camera and an IP66 camera look identical on a spec sheet at a glance, but the second digit is doing all the work for outdoor durability.
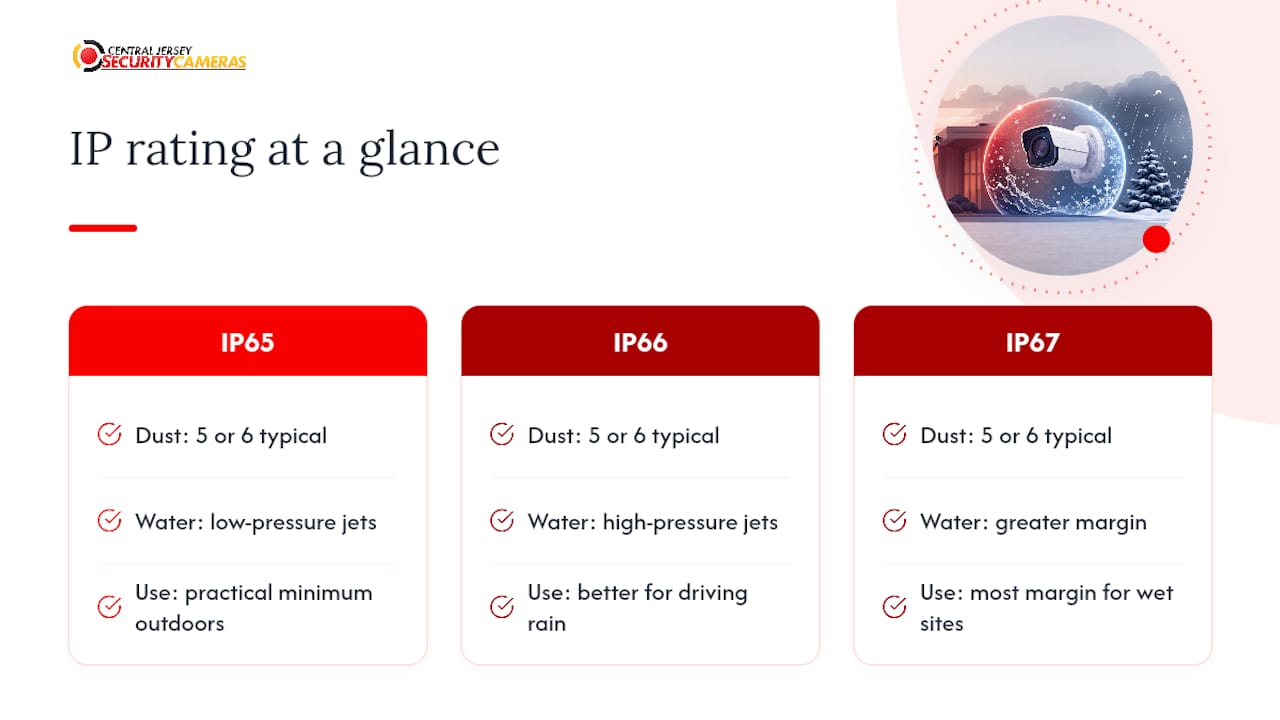
The first digit covers dust and solid particle resistance, usually a 5 or 6 on outdoor cameras, while the second digit covers water. A 4 means splash resistance from any direction, a 5 means low-pressure water jets, and a 6 means high-pressure jets from any angle, which is the number you want for anything exposed to driving rain or a garden hose accident. IP65 is the practical minimum for outdoor use; IP66 or IP67 gives more margin in a spot that catches wind-driven rain or gets pressure-washed during siding cleaning.
IK ratings are a separate scale for impact resistance, expressed as IK07 through IK10 on most camera housings. This matters less for a camera under a residential eave and more for a commercial unit mounted at ground level near foot traffic, where a rating of IK08 or higher resists a deliberate kick or a thrown object.
Temperature range is the number people skip entirely, and it’s arguably more important than the IP rating for anyone in a climate with real winters or summers. Outdoor-rated cameras commonly list an operating range from around -4°F to 122°F, but that’s the operating range, not the charging range.
Statistic Callout: Many battery-powered outdoor cameras cannot safely charge below 32°F (0°C), even though the camera keeps recording fine in the cold. A battery camera left outside in a New Jersey January can run down and simply refuse to top off until temperatures climb back above freezing.
For coastal or bayfront properties, add one more filter: salt-air corrosion. Standard aluminum or plastic housings degrade faster near saltwater. Look for marine-rated or corrosion-resistant housings if the camera sits within a mile or two of the shore, since a rusted mounting bracket after two seasons is a far more common failure than the camera electronics themselves.
Which Power and Installation Option Holds Up Best in Wet Weather?
Power source decides more about long-term reliability than almost any other spec on the box. Buying guides consistently point to matching the power type to the mounting location rather than picking whatever looked good in a store display, and that advice holds up especially well once weather enters the picture.
- Wired or PoE (Power over Ethernet) delivers continuous power and a stable data connection through a single cable, which means no battery cycle to manage and no dead camera during a storm when you need footage most. Run the cable through weatherproof conduit and add surge protection, since a lightning strike on an unprotected line can take out a camera and, in bad cases, the NVR behind it.
- Plug-in cameras sit between wired and battery, drawing continuous power from a nearby outlet without a full Ethernet run, a reasonable fit for a porch or garage where an outlet already exists.
- Battery and solar-assisted cameras go anywhere, but the trade-off is real: a solar panel meaningfully extends run time in most climates but doesn’t fully solve the winter charging problem, since low sun angles and short days cut solar output right when battery drain from cold weather is highest. Plan on manual recharges every few weeks in winter even with solar assist. A solar-powered camera installation makes the most sense for detached structures or gate entrances where trenching cable isn’t practical.
- Cellular cameras solve the true off-grid case, a remote gate, a rural driveway, a hunting cabin, at the cost of a monthly data plan and, usually, event-only recording instead of continuous video to keep data use down.
Pro Tip: If you’re wiring a camera yourself, seal every outdoor junction box with silicone sealant rated for exterior use, not standard caulk, and confirm the enclosure meets your local electrical code before closing it up. Water finds its way into a box through gaps most people wouldn’t think twice about.
Local Storage or Cloud: Which Handles Weather Disruptions Better?
Storage choice and power choice are tied together more than most buying guides admit. A camera that loses Wi-Fi during a storm still needs somewhere to put its footage, and that’s where local recording earns its keep.
- Local NVR or on-device SD card keeps footage recording even during an internet outage, which matters most during the exact severe weather event you bought the camera to catch. It also avoids a recurring subscription and keeps raw footage off a third-party server.
- Cloud subscriptions trade that resilience for convenience: footage is viewable from anywhere, backed up off-site, and often paired with AI features like person or vehicle detection. The trade-off is a monthly or annual fee and dependence on your internet connection staying up during the event you care about.
- Continuous recording captures everything, useful for a business needing an unbroken record, but it demands wired power and enough local storage or bandwidth to sustain it.
- Event-only recording triggers on motion, which is how most battery cameras conserve power, but it also means a fast-moving event can be missed in the second or two before recording kicks in.
The honest answer for most homeowners is both: local storage as the fallback, cloud as the convenience layer. A camera that only offers cloud storage and loses connectivity mid-storm has, in effect, stopped protecting you right when it matters. Consumer Reports also flags that not every wireless camera advertised as weatherproof actually holds up as claimed, which is one more reason a local backup is worth having regardless of subscription plans.
How Do Weatherproof Cameras Actually Perform in Extreme Weather?
Rain is the easy case. Most IP65+ cameras handle a downpour without issue. Snow, ice, and temperature swings are where the real failures show up, and they’re rarely about the camera drowning. They’re about the electronics or the battery hitting their limits.
Statistic Callout: Outdoor-rated cameras typically operate down to around -4°F, but battery charging usually stops working below freezing. A camera can keep filming through a cold snap and still die a week later because it never got the chance to recharge.
- Built-in heaters on some higher-end models prevent lens icing and keep internal components within their working range during hard freezes.
- Hydrophobic lens coatings shed rain and condensation faster, reducing the blurry, water-streaked footage that plagues cheaper cameras during storms.
- Lens hoods block direct rain and glare, and also cut down on the false motion alerts triggered by raindrops or snowflakes passing close to the sensor.
- Motion tracking and AI-based detection, features testing labs increasingly flag as standard on premium models, distinguish a person or vehicle from wind-blown branches or blowing snow, which is the single biggest fix for weather-triggered false alerts.
- A weatherproof enclosure built for the camera model outperforms relying on the camera’s own housing alone in genuinely harsh spots, like an exposed rooftop or an unshaded south wall that bakes in summer heat.
Where Should You Mount a Weatherproof Camera for the Best Results?
Placement mistakes cause more bad footage than cheap hardware does. A $300 camera mounted wrong produces worse results than a $150 camera mounted well, and that’s the single most common gap installers see between DIY jobs and professional setups.
- Mount at 8 to 10 feet for identification purposes (faces, license plates) and closer to 10 to 12 feet for broad detection coverage where you’re monitoring activity rather than trying to identify individuals.
- Angle the camera downward around 15 to 30 degrees rather than pointing it level, which reduces sky glare and keeps the frame focused on the ground-level activity that actually matters.
- Avoid mounting directly under a roofline drip edge or gutter seam, a surprisingly common mistake that sends runoff straight across the lens every time it rains, degrading footage regardless of the camera’s IP rating.
- Check the Wi-Fi signal at the exact mounting point before drilling anything. A camera that reads full signal in the garage can drop to nothing 20 feet away against exterior siding; an outdoor-rated access point or mesh extender solves this far more reliably than hoping the signal holds.
- Route PoE cable runs through conduit and keep connectors inside weatherproof junction boxes, since exposed connectors are one of the most common points of water ingress over a camera’s lifespan.
- Mount out of easy reach where tampering is a concern, and use tamper-resistant screws or a locking bracket for ground-level or publicly accessible locations.
For gated driveways specifically, placement rules get more particular since you’re usually balancing license-plate identification with a wide enough field of view to catch the whole approach. A dedicated driveway camera placement guide walks through the height and angle trade-offs for that exact scenario in more detail.
What Does Year-Round Maintenance Actually Look Like?
Weatherproof doesn’t mean maintenance-free. Seals degrade, mounts loosen, and firmware falls behind, all quietly, until a storm exposes the weak point.
- Inspect seals and gaskets quarterly, especially after the first hard freeze and again after the peak of summer heat, since both temperature extremes stress rubber seals.
- Clean the lens by hand every few weeks, not just when footage looks obviously foggy. Pollen, salt spray, and dust film build up gradually and reduce night vision performance before it’s visible in daylight clips.
- Bring battery cameras indoors or swap batteries proactively before deep winter, rather than waiting for a low-battery alert that may never fire if the camera has already lost the ability to charge.
- Replace gaskets and add fresh desiccant packs inside housings every year or two, particularly on coastal properties where humidity cycling accelerates seal breakdown.
- Update firmware as soon as it’s available, since manufacturers frequently patch both security vulnerabilities and weather-related bugs, like false alerts from moisture on the sensor, in the same release cycle.
Pro Tip: Set a recurring calendar reminder for the first weekend of each season to walk the property and physically touch every camera mount. Loose brackets and cracked seals are almost always caught by hand, not by the app. Pair that habit with strong, unique passwords and two-factor authentication on the camera app itself, since a physically secure camera with a weak login is still a soft target. A full maintenance walkthrough covers the seasonal specifics in more depth if you want a printable checklist.
How Should You Choose and Budget for a Weatherproof System?
Turn everything above into a decision by working through it in order, not by falling in love with a feature list first.
- Assess the site first. Is there existing power or Ethernet nearby? What’s the realistic winter low temperature? Is the spot coastal, shaded, or exposed to direct storm-facing wind?
- Set the minimum weatherproof rating from that assessment. IP65 for a covered porch, IP66 or higher for anything exposed to driving rain, salt-resistant housing for coastal properties.
- Pick the power path based on what’s actually available, wired or PoE where cable runs are feasible, solar-assisted battery for detached spots, cellular only when there’s genuinely no other connectivity option.
- Decide on storage, local NVR or SD card as a baseline, cloud as an add-on if remote access and AI detection matter to you.
- Ask any installer or retailer three specific questions: what’s the warranty term on outdoor units, is surge protection included or an add-on, and what IP and temperature rating does the exact model carry, not the product line in general.
| Tier | Typical setup | Best fit |
|---|---|---|
| Entry (DIY battery) | 1 to 4 wire-free battery cameras, app-based viewing | Renters, small yards, low-risk properties |
| Midrange (plug-in/PoE kit) | 2 to 6 cameras, mixed power, local or cloud storage | Homeowners wanting reliable coverage without a full pro install |
| Professional NVR system | Wired/PoE cameras, dedicated NVR, surge protection, pro-installed | Larger properties, businesses, anyone prioritizing long-term reliability |
Cost climbs with reliability, and that’s the honest trade-off: a DIY kit is cheaper up front but pushes maintenance and troubleshooting onto you, while a professionally installed system costs more initially and pays that back in fewer failures over the years.
What Do Professional Installers Fix That DIY Setups Usually Miss?
Most weatherproofing failures aren’t camera problems, they’re installation problems. Professional installers routinely add surge protection, use weatherproof-rated junction boxes, and route PoE cable runs inside walls instead of leaving exposed cable draped along siding, a fix that prevents most of the water ingress and connector failures DIY installs run into within a year or two.
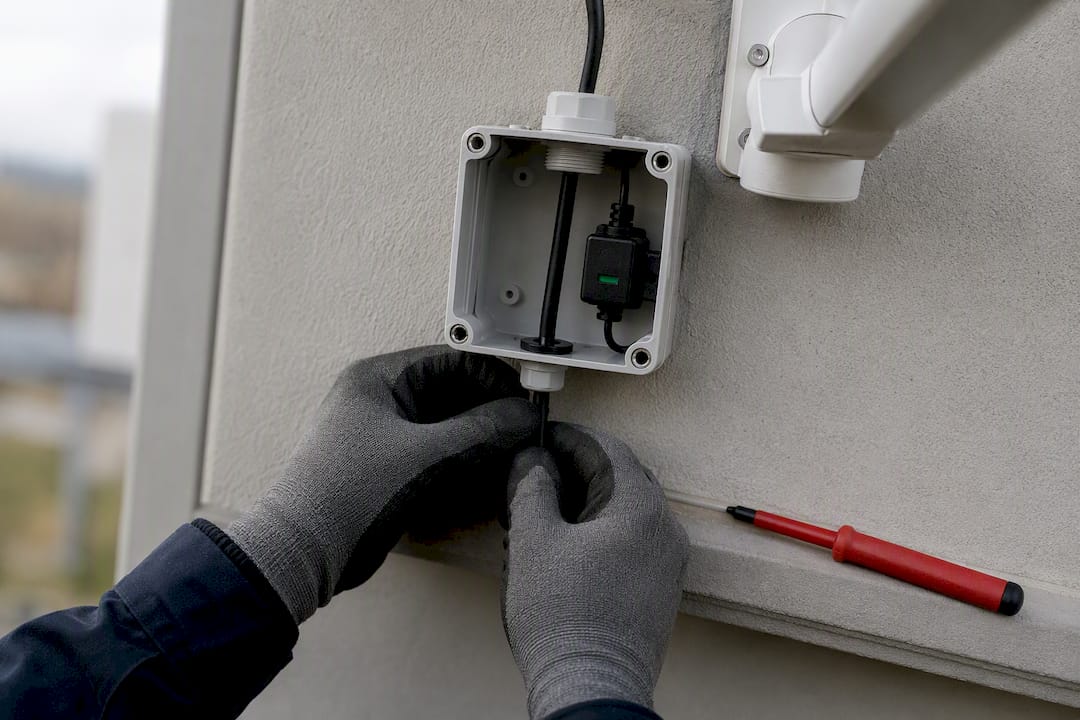
The common DIY mistakes are predictable: cable entering a junction box from the top instead of the bottom (letting water run straight down the wire into the box), standard indoor-rated connectors used outdoors, and cameras mounted without any surge protection ahead of a lightning-prone electrical panel.
Central Jersey Security Cameras handles this for properties across Central New Jersey, including custom system design, weatherproof cable routing and junction box placement, NVR integration, and ongoing service. Call in a professional when a property has multiple cameras to coordinate, existing wiring that needs assessment, or a history of repeat weather-related failures on a DIY setup.
An Editorial Take: Weatherproof Specs Are the Easy Part
The IP rating gets all the attention in buying guides, and it’s honestly the part least likely to bite you. Most cameras marketed as outdoor-rated do survive rain. What fails, repeatedly, is everything around the camera: a junction box wired wrong, a battery nobody planned to recharge in January, a mounting angle that catches every drop of runoff from the gutter above it.
Conventional advice treats weatherproofing as a spec-sheet problem, something you solve by buying the right number. It’s actually a site-planning problem. The same IP66 camera performs completely differently mounted under a deep eave versus bolted to an exposed south wall in direct sun and wind.
If there’s one thing worth prioritizing first, it’s not the camera at all. It’s the power and cable plan behind it. A mediocre camera on solid wiring with proper conduit outlasts a premium camera on exposed cable and a battery nobody remembers to charge. Buy the spec sheet second. Plan the installation first.
— Tom
Get a Weatherproof System Installed Right the First Time
A DIY battery camera or a big-box wireless kit can work for a small yard on a tight budget, but neither one solves the wiring, sealing, and surge-protection problems that cause most outdoor camera failures within a year or two. Professional installation provides custom-designed systems with weatherproof junction boxes, properly routed PoE and conduit, and NVR integration built for years of reliable operation, not a weekend fix.

Professional installation is the right call whenever a property has multiple cameras to coordinate, existing wiring that needs an honest assessment, or a history of DIY installs failing after the first hard freeze or a heavy storm season. Professional installers serve homes and businesses throughout Ocean, Monmouth, Middlesex, Mercer, and Burlington Counties, along with the surrounding areas. Request a site survey and estimate to get a system designed around your property’s exact exposure, power access, and coverage needs, not a generic kit pulled off a shelf.
Sources
This guide draws on Consumer Reports’ security camera buying guide for weatherproofing verification advice, CNET’s 2026 home security camera roundup and PCMag’s outdoor camera testing for hands-on feature and ruggedness evaluations, and Wyze’s published tech specs for operating and charging temperature data. For readers comparing available CCTV models across retailers, the CCTV marketplace overview from Security Jobs Board is a useful starting point.
FAQ
What Is the Best Waterproof Outdoor Security Camera?
There’s no single best model since the right choice depends on your climate and mounting location, but any camera rated IP65 or higher, with an operating range suited to your winters, covers the waterproofing requirement. Match that rating to the right power and storage setup, and the housing itself stops being the limiting factor.
What Is the Best Outdoor Security Camera to Get Overall?
The best pick depends on whether the priority is identification (a bullet-style camera), broad coverage (dome or PTZ), or deterrence (a floodlight model), so start from the use case rather than a single “best” product. For anyone unsure where to start, professional installers can assess the property and recommend a specific setup rather than guessing from a spec sheet alone.
What’s the Best Outdoor Security Camera Without a Subscription?
Look for a camera that supports local recording to an SD card or a local NVR, since that avoids the recurring cost of cloud storage entirely. Consumer Reports notes that wireless camera weatherproofing and storage options vary widely, so confirm local-storage support before buying if a subscription is a dealbreaker.
What Security Camera Works Best in Cold Weather?
A wired or PoE camera handles cold weather most reliably, since it isn’t dependent on battery charging, which typically stops working below 32°F. If battery power is the only option, plan on solar assist plus manual recharging through the coldest months rather than expecting the camera to manage itself.