
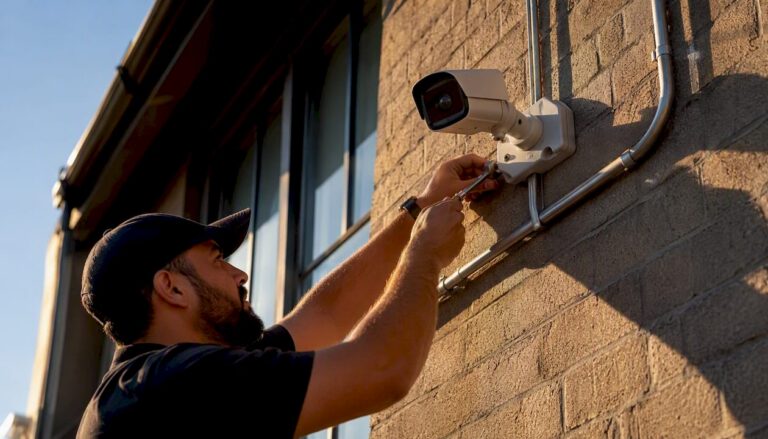
A properly designed, visible, and monitored camera system significantly deters opportunistic vandalism at commercial properties. That’s the verdict, backed by research on CCTV deterrence and confirmed by installers who see the same patterns across strip malls, warehouses, and office parks in Central New Jersey every week. Cameras work best when someone can actually see them, when there’s a real response behind them, and when the hardware is tough enough to survive a first attempt at tampering.
What doesn’t work as well: a single dome camera bolted over a back door, unmonitored, feeding a DVR nobody checks. That setup catches footage after the damage is done. It rarely stops anything.
Here’s what to do tonight, before you read another word:
- Walk your property after dark and note every camera that’s obscured by foliage, glare, or distance from the area it’s supposed to cover.
- Confirm every visible camera has a working status light or is paired with signage announcing surveillance, since a camera nobody notices deters nobody.
The two-line version: make your cameras impossible to miss, and pair them with a monitored response so someone (or something) actually reacts when trouble starts. Everything else in this guide builds on that.
Key Takeaways
Cameras deter vandalism most reliably when they’re visible, professionally installed with tamper-resistant hardware, and backed by live monitoring rather than left to record passively.
| Point | Details |
|---|---|
| Visibility drives deterrence | Cameras only deter behavior people can actually notice; hidden units alone add evidence, not deterrence. |
| Pair cameras with monitoring | A monitored alarm or live audio warning converts a passive recorder into an active deterrent. |
| Harden the hardware | IK-rated housings and conduit-protected cabling stop vandals from disabling the system in seconds. |
| Inspect monthly | Check mounts, lenses, and tamper alerts at least once a month to keep footage and deterrence reliable. |
| Signage supports enforcement | Posted notice reinforces loitering and trespass enforcement alongside camera coverage. |
| Layer your defenses | Lighting, signage, and physical barriers close the gaps cameras alone can’t cover. |
| Central Jersey Security Cameras | Designs, installs, and maintains custom commercial camera systems across Central New Jersey, including tamper-resistant cabling and monitored response integration. |
Table of Contents
- How Cameras Deter Vandalism on Commercial Property
- When Cameras Alone Won’t Stop Vandalism
- Where to Place Cameras for Maximum Deterrence
- Camera Features That Actually Improve Deterrence
- Integrating Cameras With Monitoring and Alarms
- Maintenance and Inspection Checklist for Vandal Deterrence
- Legal and Privacy Considerations for Surveillance Footage
- What Cameras and Monitoring Typically Cost
- DIY vs. Professional Installation: How to Decide
- How Central Jersey Security Cameras Helps You Deter Vandalism
- Sources
How Cameras Deter Vandalism on Commercial Property
Vandalism is mostly an anonymity crime. Someone tags a wall, smashes a window, or keys a gate because they believe no one is watching and no one will trace it back to them. A visible camera breaks that assumption before the first spray-paint can gets shaken.
Visibility is the mechanism, not the recording itself. A camera pointed at a loading dock does nothing to deter behavior if the person walking past never notices it. What changes behavior is the perception of being watched, identified, and potentially reported. That’s why visible CCTV combined with clear signage outperforms hidden cameras for pure deterrence, even though hidden units still have a role as backup evidence capture.
The research on this isn’t uniform, and that matters. A review of public surveillance programs found that camera impact on crime varies significantly depending on program design, placement, and whether anyone is actually monitoring the feed. Cameras aren’t a magic deterrent switch. They’re one input in a system, and the system design determines whether the deterrent effect shows up at all.
Where deterrence tends to be strongest:
- Front entrances and building facades facing public sidewalks or parking areas, where foot traffic and visibility are already high.
- Parking lots and loading docks, common vandalism targets because they’re often poorly lit and rarely staffed after hours.
- Fence lines and side alleys, the routes someone takes specifically because they assume no one’s watching.
Pro Tip: Mount at least one camera at eye level near your main entrance, even if it’s not your primary coverage angle. A camera someone has to look up to notice does less deterrent work than one they walk right past.
When Cameras Alone Won’t Stop Vandalism
Cameras deter opportunists. They rarely deter someone who’s intoxicated, enraged, or determined to cause damage regardless of consequences. Installers see this pattern constantly: the vandal who smashes a window in full view of an obvious camera because they weren’t thinking about consequences at all, or because they’d already decided the risk was worth it.
A comparison of commercial vandalism outcomes found that unmonitored cameras mostly function as after-the-fact documentation. They help you identify a suspect and support an insurance claim. They don’t stop the incident while it’s happening, because nobody’s watching in real time and nothing interrupts the act.
A few conditions turn a deterrent system into a documentation-only system:
- Cameras mounted low enough to be blocked, sprayed over, or physically knocked off their mount within seconds.
- Poor lighting that leaves footage too grainy to identify anyone, even when the camera captured the whole event.
- No live monitoring, meaning alerts sit unreviewed until someone checks the system the next morning.
- Exposed wiring running along an exterior wall, which is often the first thing a determined vandal cuts.
The trade-off calculation is simple: the higher the value of what you’re protecting and the more isolated the location, the more you need live monitoring, added lighting, or physical barriers layered on top of cameras rather than relying on cameras alone.
Where to Place Cameras for Maximum Deterrence
Placement decides whether a camera system deters anything or just watches an empty parking lot. Every commercial property has a handful of zones that matter more than the rest, and installers prioritize those first.
High-priority zones:
- Every entrance and exit, including staff-only doors that vandals sometimes use precisely because they assume no camera covers them.
- Ground-floor windows facing streets, alleys, or parking areas, especially storefront glass.
- Loading docks and rear delivery areas, which see far less foot traffic and far more vandalism.
- Parking lots, particularly the corners farthest from lighting or building entrances.
- Fence lines, rooftop HVAC units, and storage yards, since equipment theft and vandalism often overlap.
Mounting height is a balancing act. Too low, and a determined vandal can reach the housing or lens directly. Too high or angled wrong, and the footage becomes useless for identification. Most installers aim for roughly 9 to 12 feet, high enough to resist casual tampering, low enough to still capture a usable facial angle before someone thinks to look down.
Sightlines matter as much as height. A camera aimed directly into a streetlight or the rising sun will wash out every frame during the exact hours it needs to work. Walk the property at different times of day before finalizing camera angles, not just once at installation.
Pro Tip: Overlap your camera fields of view at every corner of the building. A single camera per side leaves a blind spot the moment someone stands directly beneath it, out of frame.
The strongest layouts pair visible, obviously mounted primary cameras with one or two hidden backup units covering the same approach paths. If someone disables the visible camera, the hidden one keeps recording. A quick way to audit your own site: walk the full perimeter after dark, map every spot where you can stand without a camera seeing you, and start your upgrade list there.
Camera Features That Actually Improve Deterrence
Not every feature on a spec sheet moves the needle on vandalism prevention. Some matter enormously. Others are marketing.
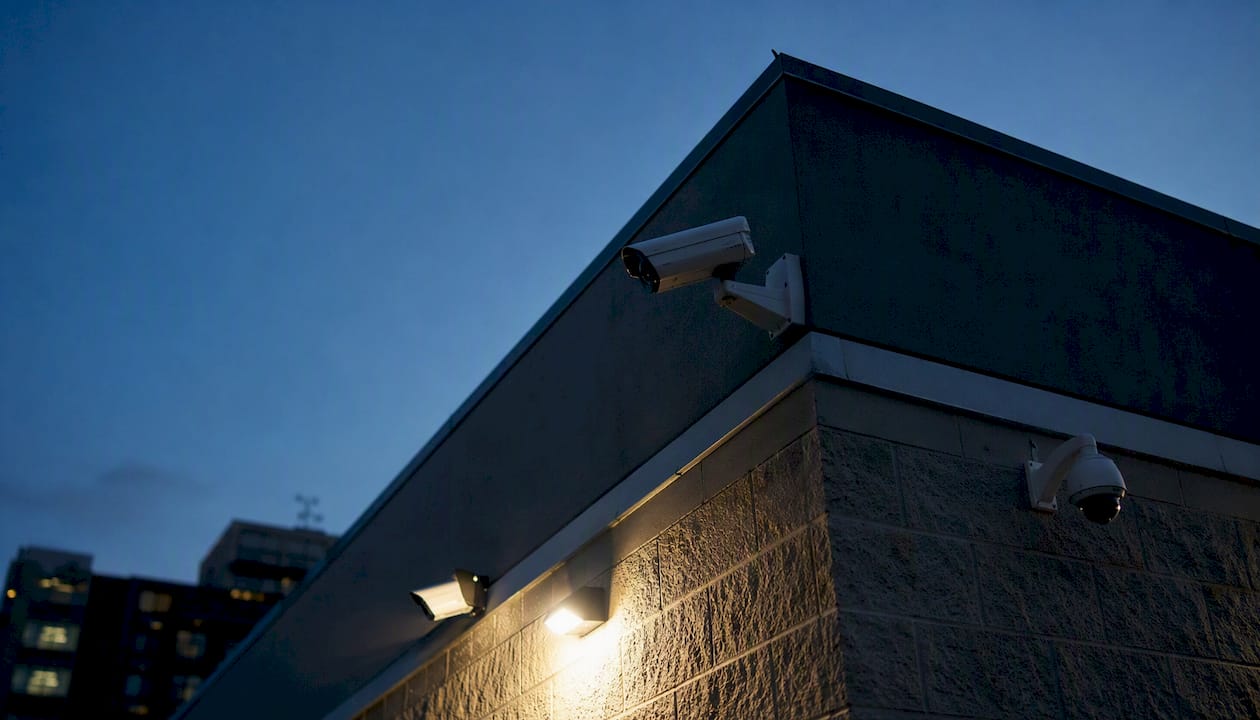
Active deterrence beats passive recording for stopping an incident in progress. Cameras with built-in two-way audio, sirens, or strobe lights let a monitoring center or automated system warn someone off in real time, rather than just recording them doing damage. Passive recording still matters for evidence, but it does nothing to interrupt the act itself.
Vandal-resistant housing is non-negotiable for any camera mounted within reach. Look for IK-rated metal housings capable of absorbing a direct hit without losing function, paired with tamper-detection alerts that notify you the moment someone tries to reposition, cover, or spray the lens.
Low-light performance separates a camera that deters from one that just exists. Most vandalism happens at night. Color night vision and infrared sensors, backed by a supplemental motion-activated floodlight, turn a grainy nighttime clip into footage that can actually identify someone.
Resolution and zoom capability decide whether footage detects a person versus identifies them. A wide-angle overview camera might catch that someone was present without ever resolving a face; a higher-resolution or PTZ unit covering the same approach can zoom in enough to matter for a police report.
Other features worth prioritizing:
- Redundant recording, meaning local storage backed by cloud archival, so footage survives even if someone physically destroys the recorder.
- Power over Ethernet with cellular backup, keeping cameras online if someone cuts main power or internet to the building.
- Conduit-protected cabling rather than exposed wire runs, since cutting an exposed cable is the fastest way to disable a system in seconds.
Industry guidance consistently points out that monitoring quality and system integration matter more than raw camera specs for business use. A mid-tier camera backed by real monitoring beats a premium camera nobody’s watching.
Integrating Cameras With Monitoring and Alarms
A camera by itself is a witness. A camera tied into a monitored alarm system is a responder. That distinction is where most of the real deterrent value lives.
The response workflow that works best follows a clear sequence:
- Detection — motion analytics or AI-assisted alerts flag activity outside normal patterns, such as someone lingering near a loading dock at 2 a.m.
- Verification — a human operator or AI system reviews the live feed to confirm it’s an actual threat, not a stray cat or a delivery truck.
- Live audio warning — the monitoring center speaks directly through the camera’s speaker, and in many documented cases that alone prompts the person to leave before anything happens.
- Escalation — if the warning doesn’t work, the system notifies the property manager and, where warranted, local law enforcement with verified video attached.
Video verification before dispatch matters for a practical reason: it keeps false alarms from burning goodwill with responders while making sure genuine incidents get a fast, informed response instead of a generic call.
For properties with irregular risk (seasonal vacancy, ongoing construction, a recent history of incidents) a hybrid model often makes sense: scheduled overnight patrol checks combined with remote live monitoring during the highest-risk hours, rather than paying for 24/7 live intervention across a low-risk daytime period. Video verification workflows built around this kind of tiered response tend to catch more real incidents without wasting resources on noise.
Maintenance and Inspection Checklist for Vandal Deterrence
A camera system that worked perfectly at installation can fail silently within months if nobody checks it. Dirt accumulates on lenses. Mounts loosen from wind and vibration. Firmware goes out of date. None of that shows up until the night you actually need footage and discover the camera’s been pointed at a wall for three weeks.
Monthly checks should cover:
- Physical inspection of every mount, bracket, and housing for looseness, rust, or visible tampering.
- Lens cleaning, since dust and grime degrade night footage long before anyone notices in daylight.
- Confirmation that each camera’s field of view still matches its original angle, since weather and vibration shift mounts over time.
- A quick review of recent footage to confirm recording quality hasn’t degraded.
Quarterly and annual reviews should add firmware updates, a full configuration audit, storage capacity checks, and a test of network resilience (does the system stay online during a brief power blip or internet outage). This is also the point to test tamper alerts directly: cover a lens, jostle a mount, or trigger motion sensors deliberately and confirm the notification actually reaches the right person, not just a dashboard nobody checks.
Practitioners commonly recommend at least monthly physical inspections as the floor, not the ceiling, for keeping footage usable and cameras functioning as an actual deterrent rather than decoration.
Pro Tip: Keep a simple log of every inspection, even a one-line note with date and initials. If footage ever ends up in a police report or insurance claim, being able to show a documented maintenance history strengthens your credibility.
On recordkeeping: most commercial systems should retain footage for at least 30 days, longer if local incident patterns or insurance requirements call for it. When exporting a clip for police or an insurance claim, export the original file format rather than a screen recording, and preserve the embedded timestamp and metadata; adjusters and investigators both rely on that for verifying authenticity. Refer to this maintenance guidance for a fuller inspection routine.
Legal and Privacy Considerations for Surveillance Footage
Commercial cameras generally have wide latitude in public-facing areas like parking lots, entrances, and building exteriors, where people have a limited expectation of privacy. That latitude narrows sharply in staff-only spaces like restrooms or break rooms, where recording can create real legal exposure. Keep cameras aimed at your property’s public-facing perimeter and access points, not at areas where employees or visitors would reasonably expect privacy.
Signage does double duty. It reinforces the deterrent effect by announcing surveillance, and it supports enforcement if you need to invoke loitering or trespass rules against someone lingering with bad intent.
Loitering and trespass statutes give property owners a practical enforcement lever, but that lever only works cleanly when the property has posted clear notice and documented the behavior. A legal overview of loitering shows how these statutes interact with monitoring and signage to support removal or prosecution, rather than leaving owners guessing about their standing.
For footage to hold up with police or an insurer, a few practices matter:
- Keep your recorder’s internal clock synced accurately, since a mismatched timestamp can undercut the credibility of otherwise solid footage.
- Export clips with metadata intact rather than converting or re-recording them, which can strip the very data that proves authenticity.
- Limit who has access to stored footage and set retention policies that don’t hold unrelated private activity indefinitely.
None of this is a substitute for legal advice specific to your property and state. If you’re dealing with an active incident, an insurance dispute, or a question about what your cameras can legally cover, confirm the details with a qualified attorney or your local authorities rather than relying on general guidance.
What Cameras and Monitoring Typically Cost
Budgeting for a commercial system involves more moving pieces than the sticker price on a camera. The real cost breaks into four categories: equipment, labor and cabling, monitoring subscriptions, and ongoing maintenance contracts.
Equipment costs scale with resolution, housing durability, and features like PTZ or active deterrence audio. Labor and cabling costs depend heavily on whether your building already has usable conduit or whether an installer has to run new protected cable runs, which is often the single biggest cost swing between a straightforward job and an expensive one. Monitoring is typically a recurring monthly fee, priced by how many cameras are covered and whether you want live human review versus AI-flagged alerts only. Maintenance contracts cover the inspection routine described above, often bundled at a modest add-on rate rather than billed as one-off service calls.
Two common pricing shapes dominate the market: a one-time installation cost paired with a monthly monitoring subscription, or a fully bundled contract that rolls equipment, installation, and monitoring into one recurring fee. The bundled model tends to suit properties that want predictable budgeting more than the lowest possible upfront number.
Timeline from first call to operational system usually runs through these stages:
- Site survey — an installer walks the property, identifies blind spots and existing infrastructure, and maps camera placement (typically same week as first contact).
- Design — a formal camera and cabling plan gets drawn up based on the survey (a few days to a week).
- Permitting — only needed for certain municipalities or larger commercial builds; can add one to several weeks if required.
- Installation — physical mounting, cabling, and network setup (typically one to three days depending on property size).
- Commissioning and testing — verifying every camera’s angle, monitoring integration, and alert routing before calling the system live (usually the final day of installation).
The variables that move cost the most are property size, whether existing cabling infrastructure can be reused, and how much live monitoring coverage you choose versus relying primarily on recorded footage and after-hours alerts.
DIY vs. Professional Installation: How to Decide
A single camera over a small storefront’s back door might be a reasonable DIY project. A multi-building commercial property, a warehouse with high-value inventory, or any site that needs footage to hold up for insurance or police is a different calculation entirely.
DIY tends to make sense when the property is small, low-risk, and the owner is comfortable troubleshooting network and firmware issues without support. Professional installation is the better call when you need reliable uptime, tamper-resistant cabling, integration with monitored alarms, or footage quality that will actually stand up in an evidence chain.
When you’re evaluating an installer, ask directly:
- Can you walk my site and show me examples of similar commercial installs you’ve completed?
- What’s your maintenance plan, and does it include a defined response time if a camera goes down?
- How do you route and protect cabling against tampering or accidental damage?
- Which monitoring partners do you work with, and how does video verification and dispatch actually work?
- What’s your process for exporting footage for police or insurance requests?
Red flags worth walking away from: an installer who quotes a price without ever visiting the site, offers a generic equipment list with no property-specific reasoning, runs cabling exposed along exterior walls, or has no maintenance plan to offer at all. Those shortcuts show up later as blind spots, cut wires, and unusable footage exactly when you need it most.
An Installer’s View: What Actually Gets Fixed on the First Visit
Walk enough commercial properties and the same three mistakes show up again and again: a camera aimed at a wall because nobody re-checked the angle after a tree grew in, exposed cabling running along an exterior wall in plain sight, and cameras mounted low enough that a determined vandal could reach the housing standing on a milk crate.
The fixes are usually fast. Re-aiming a misangled camera takes minutes. Adding one motion-activated floodlight to a dark loading dock often does more for deterrence than a second camera would. Routing exposed cable through conduit costs little compared to the cost of losing footage right when it matters.
What separates a site that actually deters vandalism from one that just documents it isn’t the camera brand. It’s whether cameras, alarms, and lighting work as one system instead of three separate purchases made at three separate times. On higher-risk properties, redundancy matters too: a hidden backup camera or an off-site copy of footage means one act of vandalism can’t wipe out your only evidence of what happened.
How Central Jersey Security Cameras Helps You Deter Vandalism
Reading a placement checklist is one thing. Walking your property and finding every blind spot, every exposed cable run, and every camera angle that drifted out of alignment last winter is another. Central Jersey Security Cameras builds custom surveillance systems for commercial properties throughout Central New Jersey, and the difference from a generic camera package is the site survey that comes first, not an afterthought.

That survey identifies your property’s actual risk points rather than applying a one-size-fits-all camera count. From there, installation includes tamper-resistant cabling routed through conduit, vandal-rated camera housings, and integration with monitored alarm response so incidents get a live reaction instead of a morning-after review. Active deterrence options like two-way audio and strobe alerts, redundant local-plus-cloud recording, and ongoing maintenance contracts round out a system built to actually stop incidents, not just film them.
Before requesting a commercial security camera assessment, have a few details ready: your property type, any recent incident history, and whether you’re looking for recorded coverage only or full live monitoring. That’s enough for Central Jersey Security Cameras to scope a site visit and give you a real plan, not a generic quote.
Sources
For deeper detail beyond this guide, a few sources are worth your time.
- Public surveillance cameras and crime
- Best Security Cameras for Business: A Complete Guide
- Loitering
For questions specific to your jurisdiction, particularly around signage requirements or footage retention rules, confirm the details with a local attorney or your municipal code office. For questions specific to your property, a site visit from a licensed installer will tell you more in twenty minutes than any general guide can.