
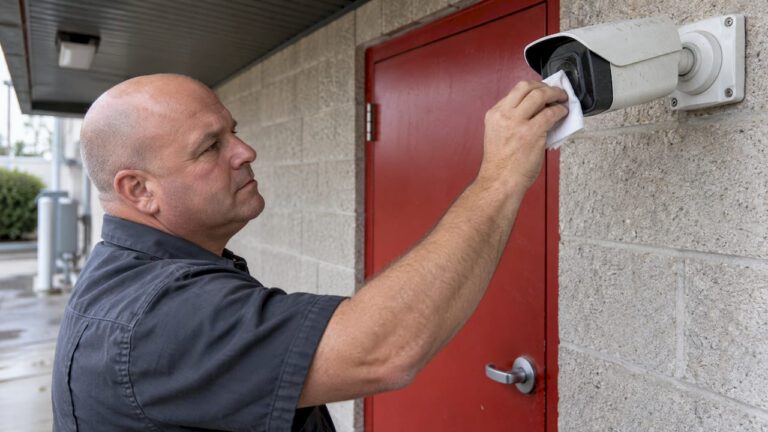
To clean a security camera lens, blow off loose grit, then wipe the glass with a clean, damp microfiber cloth in gentle circles from the center outward, and dry it. Use water, with at most a drop of dish soap for stubborn film. Skip glass cleaner, alcohol and paper towels, because they strip or scratch the coating that gives you a sharp picture. If the camera sits above a safe ladder reach, leave it to a professional. A camera that is still hazy after cleaning usually has a focus, moisture or seal problem, not a dirty lens.
TL;DR
- Use a soft, lint-free microfiber cloth dampened with plain water. Add one drop of dish soap only for residue that water will not lift.
- Never use glass cleaner, rubbing alcohol, household sprays, paper towels or a pressure hose. They can leave residue, scratch or wear the lens coating.
- Blow off dust and grit first, so you never drag sand across the glass.
- Cameras above safe ladder reach, over driveways, or near power lines are a job for a professional, not a stretch from the top rung.
- Fog or haze that returns after cleaning points to moisture inside the housing or a focus issue, and that needs a technician.
Table of Contents
- Why a dirty lens ruins the footage you are paying for
- What you need before you start
- What never to use on a camera lens
- Step by step: cleaning the lens
- Outdoor cameras: dirt, water spots and winter
- Cameras you cannot reach safely
- Still blurry or foggy after cleaning?
- How to keep lenses cleaner between wipes
- When a professional visit pays for itself
- Our approach to keeping cameras clear
- Our perspective
- FAQ
- Sources
Why a dirty lens ruins the footage you are paying for
A camera is only as good as the thin piece of glass in front of its sensor. Pollen, road dust, spider webs, water spots and fingerprints scatter light before it reaches the image sensor. The result is a soft daytime picture, bright rings or haze at night when infrared light bounces off dust or smears, and faces or license plates that turn into blobs exactly when you need them.
Here in New Jersey the conditions are hard on lenses. Salt spray near the shore, pollen in spring, construction dust, winter road grime and wet snow all settle on outdoor cameras. A system that recorded sharp 4K video the day it was installed can quietly drift to a hazy picture over a few months, and nobody notices until an incident needs review.
The fix is simple, but the way you do it matters. Most lenses carry a thin coating, and the quickest ways to clean a lens (a paper towel, a squirt of window cleaner) are the ones that damage it.
What you need before you start
Keep the kit small and clean:
- Two microfiber cloths. One to wipe, one to dry. Wirecutter’s camera-cleaning guide recommends a microfiber cloth, a tiny amount of water and optionally a little dish soap. Google’s own support page asks for a soft, lint-free cloth.
- A hand air blower or can of compressed air. Wirecutter suggests an air puffer for dust. It removes grit without touching the glass.
- Plain water in a small cup or a barely damp corner of the cloth. You are dampening, not wetting.
- Dish soap, one drop, only if needed.
- A stable ladder or step stool for any camera you cannot reach from the ground, plus a second person to steady it.
That is all. You do not need a specialty spray, and you should not reach for the cabinet under the sink.
What never to use on a camera lens
This is where most damage happens, so it comes before the steps.
Paper towels, tissues and rags. Google’s support guidance says they can leave lint behind and even scratch the lens coating. Shop towels and old T-shirts are no better, because they hold grit from earlier jobs.
Glass cleaner, rubbing alcohol and household cleaners. Google advises against window and mirror cleaner, rubbing alcohol and other household cleaners, which may contain harsh chemicals and leave residue. A Google Nest product manager told Wirecutter the same: household cleaners or alcohol can leave residue or erode lens coatings, and soap and water should do the job.
Spraying the camera directly. Liquid runs into seams, the microphone opening, vents and connectors. If you use any liquid, put it on the cloth, not on the camera.
Submerging, hosing or pressure washing. Google says not to submerge a camera in water and to avoid a high-pressure hose on outdoor models. A hose can also knock the camera off its aim.
A dry scrub. If the lens is gritty, wiping it dry turns that grit into sandpaper. Always blow loose debris off first.
A broom or leaf blower on a high camera. Wirecutter specifically warns that a broom can scratch the lens, and a leaf blower can drive debris into the camera or knock it out of position. Compressed air is the safer choice.
Step by step: cleaning the lens
1. Check the camera and the conditions
Pick a dry, calm day. Wet weather, high wind and snow make ladder work more dangerous and leave streaks anyway. If your camera is on a recorder-based system, note where it is pointed before you touch it. Many people nudge the housing while cleaning and discover days later that the camera now faces the sky.
If the camera is wired for power over the network cable, you do not need to unplug anything for a simple wipe, but pausing recording or alerts for the area avoids a flood of motion notifications while your hand is in front of the lens. Never open a housing or pull a cable to clean the outside.
2. Blow off loose dust and webs
Use the air blower or short bursts of compressed air, holding the can upright and a few inches away. Work across the lens, the dome cover and the sun shield. Spider webs and egg sacs collect under the shield and in the seam, and they cause the bright blur many owners see at night when infrared light bounces off them. Wipe webs from the housing, not the lens.
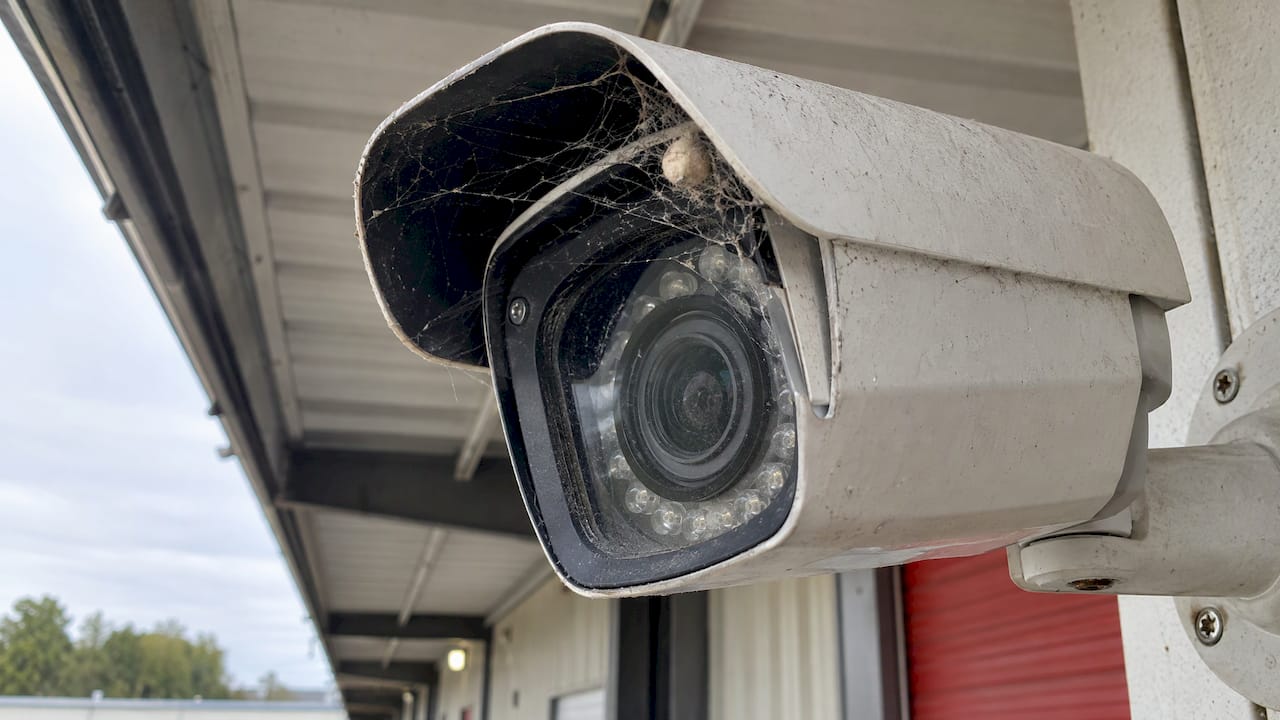
This step matters more than any other. Grit that is blown away cannot scratch the glass.
3. Dampen a microfiber cloth with water
Wet a clean corner of the cloth, then wring it out until it is damp, not dripping. Fold the cloth so you are touching the lens with a flat, clean surface and not a seam or a tag. Wirecutter’s approach is to try the damp microfiber cloth first and only add dish soap if water is not enough.
4. Wipe gently in circles from the center out
Hold the camera steady with one hand so you are not twisting the mount, then wipe the lens in light circular motions starting at the center and moving to the edge. Light pressure is enough. If a spot will not move, do not press harder: repeat with a fresh damp section, or move to the soap step.
5. For residue, use a single drop of dish soap
Sap, bird droppings, hard water spots, grease from a kitchen vent and sticky pollen film may need a little help. Put one drop of mild dish soap on a damp cloth, work it in, wipe the lens, then go over it again with a cloth dampened with plain water so no soap film remains. Soap left on the glass causes the same haze you were trying to remove.
6. Dry the lens and the dome
Finish with a second, dry microfiber cloth. Drying prevents water spots and streaks, which otherwise show up as glare when headlights or porch lights hit the glass at night.
7. Check the view before you walk away
Open the live view on your phone or monitor. Confirm the image is sharp, the framing is the same as before and no smudge or lint is visible. A fingerprint on the inside of a dome shows up clearly under infrared. If the picture has shifted, re-aim the camera now rather than discovering the gap later.
Outdoor cameras: dirt, water spots and winter
Outdoor cameras get the same method with a few extras. Dust the housing first, then clean the lens. Google’s guidance for outdoor Nest cameras is to hold the camera in place, gently wipe the lens with a soft lint-free cloth, use compressed air for dust and use a cloth moistened with water for water spots. Water alone clears most of it.
A few New Jersey-specific habits help:
- After a nor’easter or heavy snow, brush snow and ice off the housing by hand, then let the lens thaw. Do not chip ice or pour hot water on a cold lens.
- Near the shore, salt mist leaves a dried film that streaks when wiped dry. Use the damp cloth first, then dry.
- In spring, pollen coats the glass in a yellow film. A damp wipe clears it quickly.
- Under eaves and soffits, check for wasp nests and webs, which are common around camera housings.
How often you clean depends on where the camera sits. A camera over a quiet front door needs far less attention than one above a loading dock, a dirt lot or a street with heavy traffic. Look at the live image whenever the weather turns, and clean when you see haze, not on a fixed date.
Cameras you cannot reach safely
Most lens problems on commercial buildings, two-story homes and warehouses come from cameras mounted high, because that is where they see the most. Cleaning them is where people get hurt.
Wirecutter’s guidance is to use a stable ladder or a dedicated camera cleaning pole, avoid wet, windy or snowy days, and use a second person where the setup needs one. Its list of hazards includes unsafe ladders, overhead electrical lines, roofs heated by the sun and traffic lanes. If the camera is beyond safe reach, it says to hire an installer or a building-maintenance professional.
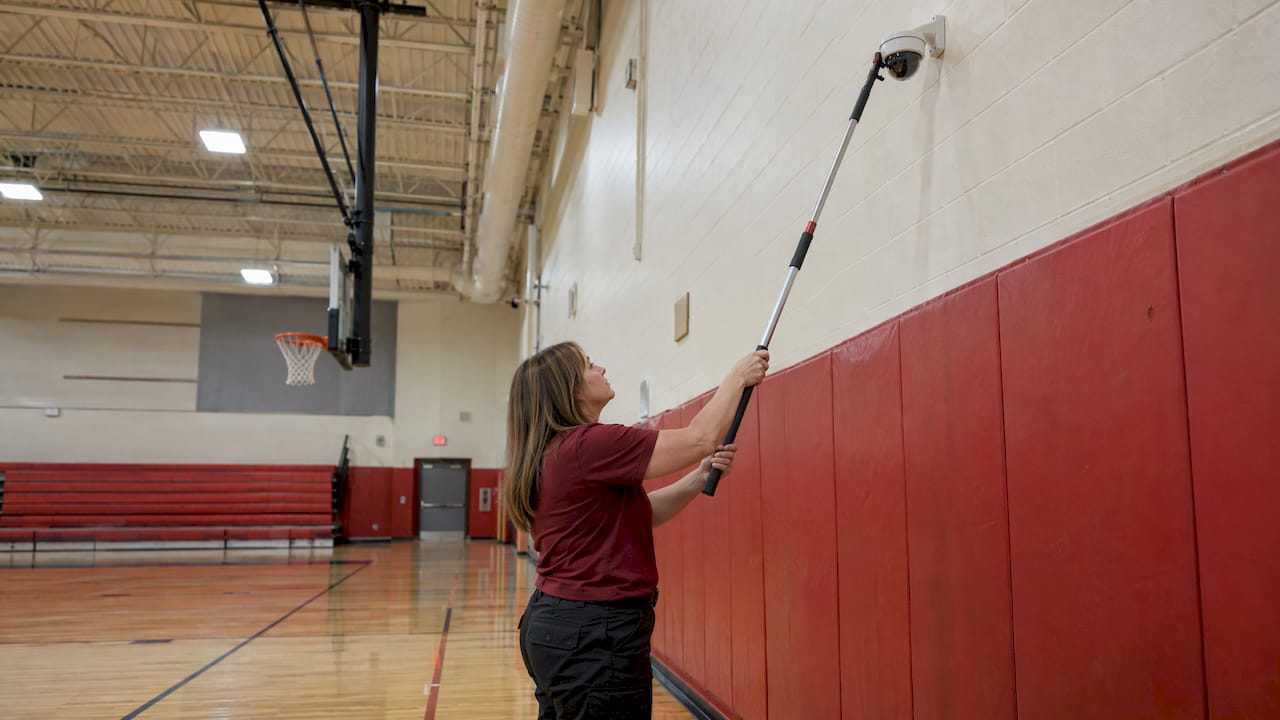
Take that seriously. A smudge is a cheap problem, and a fall from a ladder is not. Do not stand on a railing, a deck chair or a bucket. Do not extend a ladder over a driveway where a car can hit it. For warehouses, rooftops and parking lot poles, a technician with the right access equipment is the only sensible choice.
Still blurry or foggy after cleaning?
If you cleaned correctly and the picture is still poor, the lens was probably not the problem. Work through these in order.
Remove the protective film. Google notes that Nest cameras ship with a clear sticker over the lens that has to be peeled off. Other cameras ship with similar film on the lens or dome, which gives a soft image all day.
Restart the camera. Google’s troubleshooting page says that if video is still blurry or spotted after a quick clean, restarting the camera or doorbell is the next step. Streaming quality settings can also make a sharp lens look soft, so check the resolution in the app or recorder.
Look at the dome from the inside. A smear on the inside of a dome, or a fingerprint left when the cover was last opened, will not come off with an outside wipe. Opening a sealed housing risks the weatherproof seal, so this is a technician job.
Check for fog or condensation. Moisture that appears between the lens and the cover, not on the outside surface, means water vapor has gotten into the housing. Wiping the outside will never fix it. The seal or gasket has usually failed, or the housing was closed on humid air during installation. Repeated fogging can eventually damage the electronics, so do not wait it out.
Check focus. Varifocal and motorized lenses can lose focus after a bump, a storm or a firmware change. A camera focused for daylight can also look soft at night if the infrared lighting is reflecting off a nearby wall, a spider web or the dome itself.
Look for scratches. A scratched lens or dome cannot be polished clean. If you see permanent marks or a cloudy coating, the dome or camera needs replacing.
How to keep lenses cleaner between wipes
The best cleaning routine is one you rarely need.
- Aim and mount for clean glass. A camera under a deep eave stays far cleaner than one bare on a wall. Spacing from trees, vents and drip edges cuts dirt, spider activity and water spots.
- Use a good housing. Domes and sun shields protect the glass from rain and glare. A properly sealed housing keeps moisture from getting in.
- Review the picture regularly. Make checking each camera’s view part of your routine, such as when you change smoke detector batteries. Catching haze early is easier than recovering footage after the fact.
- Clean after storms and construction. Heavy weather and nearby building work coat lenses faster than ordinary months.
- Do not wax or coat the lens. Rain-repellent products from the auto aisle can smear and mist under infrared light.
For a home with several cameras, or a business with a dozen across a building, a fixed schedule written down is better than good intentions. Our guide to security camera maintenance for homeowners explains what a regular check should cover beyond the lens: mounts, cables, recorder storage and image quality.
When a professional visit pays for itself
Cleaning is one task in keeping a surveillance system reliable. A technician looking at your system sees things a wipe-down never will: a loose mount that lets the camera sag, a failing gasket, a cable run chafing on a corner, a recorder drive near capacity, a lens that has drifted out of focus, or a camera whose field of view no longer covers the door it was meant to watch.
That is the real argument for professional upkeep on a system that protects a house or a business. A camera that records but cannot show a face or a plate is not doing its job, and you only find out after something happens. The tidy approach is to have the person who designed and installed the system look after it, because they know what the image should look like.
If you run a business, the stakes are higher. Footage that shows a vehicle but not its plate, or a person but not a face, undermines an insurance claim or a police report. A written maintenance agreement sets out what gets checked and how often; our article on what to put in a security camera maintenance contract walks through the seven checks worth writing down.
Our approach to keeping cameras clear
We design, install and maintain custom surveillance systems for homes and businesses across Central New Jersey, including Ocean, Monmouth, Middlesex, Mercer and Burlington counties. That includes ongoing service and support for the systems we install, and repairs on commercial properties. If a camera is mounted where a ladder is not safe, or you want someone to look at fogging, focus or a failing housing, that is a call to us, not a risky afternoon on a roof.
We also offer free on-site evaluations, so you can have the whole system looked at, not just the one camera that looks dirty. If you are thinking about a new system, our security camera installation service carries a one-time installation fee of $99, and we place cameras with maintenance access in mind. For homes, see home security installation, and for businesses, commercial security installation and repairs.

To talk through your property, start at Central Jersey Security Cameras.
Our perspective
Most blurry cameras we hear about are not broken. They are dirty, fogged or slightly out of focus, and the owner has been living with a worse picture for months without knowing it.
We believe a surveillance system should be designed so the lens problem is rare: cameras placed where weather and webs reach them less, housings chosen for the conditions, and everything mounted so that it can be serviced safely. That is the advantage of a custom system over a box of cameras screwed to a wall wherever there was a stud.
The cleaning steps in this article work, and you can do them on a low camera in five minutes. For everything else, the camera at the second-story peak, the dome that fogs after every storm, the commercial lot with ten poles, we think the right answer is a professional who knows the system and has the equipment. That is why we pair installation with ongoing local service and support.
Tom
FAQ
Can I use glass cleaner or rubbing alcohol on a security camera lens?
No. Google’s support guidance advises against glass cleaner, rubbing alcohol and other household cleaners, because they can contain harsh chemicals and leave residue. A Google Nest product manager also told Wirecutter that they can erode lens coatings. Plain water on a microfiber cloth, plus one drop of dish soap if needed, is the safe method.
Why is my security camera blurry at night?
At night, the camera relies on infrared light, which bounces off dust, webs, smears and a dirty dome and creates bright rings or haze. Start with a gentle cleaning of the lens and dome, and clear webs from the housing. If the haze remains, check for fog inside the cover, a protective film that was never removed, or lost focus.
How do I fix a foggy security camera lens?
Fog on the outside wipes away with a dry microfiber cloth. Fog trapped inside the dome or housing means moisture has entered, usually through a worn seal. Wiping will not cure it, and opening the housing can make it worse, so have a technician reseal or replace the housing.
How do I clean a camera mounted high on a wall?
Use a stable ladder with a second person, or a cleaning pole, on a dry, calm day, and use compressed air rather than a broom or leaf blower. Stay clear of power lines and traffic lanes. If you cannot reach it safely, have a professional do it.
Is it safe to spray water from a hose onto an outdoor camera?
Google advises against spraying outdoor cameras with a high-pressure hose. Force can push water past seals and shift the camera’s aim. Use a damp cloth instead.
Sources
- Clean your Google Home or Nest devices, Google Nest Help
- Troubleshoot video that’s blurry, pixelated, discolored, or distorted, Google Nest Help
- How to Clean Your Home Security Cameras, Wirecutter