
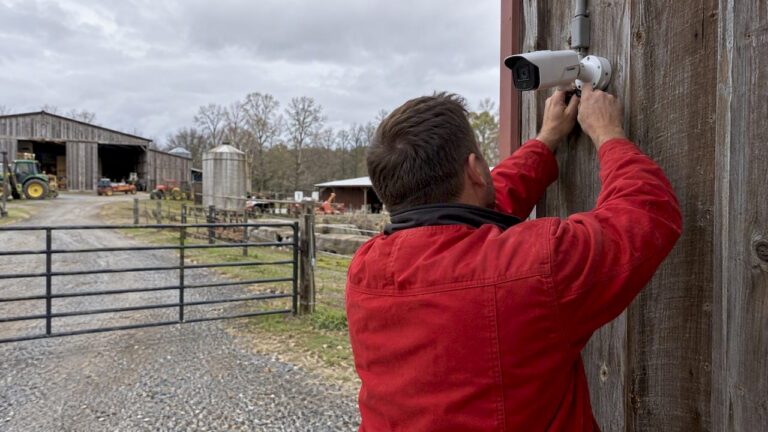
A good farm camera layout starts with coverage, not camera count: sketch your property, mark gates, barns, equipment sheds, and choke points, then place cameras so every priority asset falls inside a usable field of view. This guide walks through that sketch-to-installation process, covers power and connectivity choices for rural sites, and gives ready-to-adapt templates for small, mid-sized, and large properties.
TL;DR:
- Give gates and shed doors tighter views for faces or plates, while pasture cameras can use wide views for motion detection.
- Run PoE where Ethernet reaches buildings; use solar and battery power for remote gates, with wireless bridges or cellular links where cables cannot reach.
- One example deployment generated 10.3 gigabytes per camera daily; cloud transfer within 24 hours requires roughly 3.47 megabytes per second, favoring local storage.
- Small farms can start with 4 to 6 cameras; midrange layouts use 8 to 16, with 30 to 60 days of local NVR storage.
- Before enabling audio, check state consent rules; keep cameras out of neighboring homes and private worker spaces, and post notice where people regularly pass.
Table of Contents
- Top Priority Spots for Your First Cameras
- Turning Your Sketch Into a Coverage Plan
- Placement Rules for Every Area of the Farm
- Power, Connectivity, and Storage for Rural Sites
- Camera Specs and Settings That Actually Matter
- Three Layout Templates by Farm Size
- What a Professional Site Survey Delivers
- Connecting Cameras to Farm Management Technology
- Legal and Privacy Rules for Farm Cameras
- Keeping Farm Cameras Running Year After Year
- What Installers Learn the Hard Way
- Get a Custom Camera Layout for Your Property
- FAQ
- Sources
Top Priority Spots for Your First Cameras
Limited budgets mean limited cameras, so placement order matters more than brand or resolution. Rank your coverage by what you would lose first to theft, fire, or liability, and work down the list.
- Equipment sheds and shop doors: mount 9 to 10 feet up, angled to catch the doorway and any windows, aimed for identification of faces and vehicles, not just motion.
- Fuel and chemical storage: cover the access point and any tanks, keeping the camera itself out of easy reach.
- Main gate and driveway entrance: position for a clear approach shot, since this is where you will capture plates and faces before someone is close enough to tamper with anything.
- Barns and livestock housing entry points: aim for the doors and aisles people and vehicles use most.
- Water, well, or irrigation equipment: these are frequent targets for theft of copper wiring and pumps in rural areas.
- Fence line choke points: gaps, low spots, or old gates where someone could enter without using the main drive.
- Loading or shipping areas: cover trailer hookup points and scale houses if you load or sell livestock on site.
- Secondary outbuildings: workshops, feed storage, or seasonal structures that hold value only part of the year.
For spots where identification matters (gates, sheds), aim for a tighter, closer view. For broad perimeter awareness, a wider detection-only view is fine. Consider rotating a camera or two toward calving pens, hay storage during harvest, or holding pens during sale season, then moving it back once that activity passes, a practice farm security planning guidance also recommends for operational monitoring like calving checks.
Turning Your Sketch Into a Coverage Plan
Draw your property on paper or a simple digital tool: mark buildings, fence lines, driveways, and any approach routes a vehicle or person could use. Add arrows for the direction of likely foot or vehicle traffic at each priority spot you identified above. This single sketch becomes the backbone of your layout and the document you hand to an installer.
Once the sketch exists, think in terms of field of view (FOV) and the DORI framework: detect, observe, recognize, identify. A camera can detect motion across a wide area, but identifying a face or plate needs a narrower, closer view with more pixels on the target. Deciding which goal each camera serves before buying lenses prevents the common mistake of installing a wide-angle camera where you actually needed identification-level detail.
- Match each priority spot to a DORI goal: gates and doors usually need recognition or identification; open pasture usually needs detection only.
- Overlap adjacent camera views at entry points so a blind spot in one angle is covered by another.
- Favor wide lenses for yards and lanes, longer focal lengths for anything requiring plate or face detail.
- Watch for occlusion: trees, parked equipment, and seasonal crop growth can block a view that was clear when you installed it.
Academic work on camera placement optimization using 3D modeling found that field of view and placement, not raw camera count, drive total coverage, and that optimization typically produces several near-optimal layouts rather than one perfect answer. That means you have real flexibility to trade area coverage for detail depending on budget.
Pro Tip: Walk your own sketch at the time of day you are most worried about activity; shadows and glare change a camera’s usefulness more than most people expect.
For sites with irregular terrain, long sightlines, or more than a dozen cameras, a professional site survey, like the 8-step site survey process we use for commercial and residential layouts, can confirm your sketch against real sightlines before anyone climbs a ladder.
Placement Rules for Every Area of the Farm
Each area of a working farm has its own mounting and angle logic.
- Sheds and equipment storage: mount above reach height at entry doors and cover internal aisles if the building holds multiple pieces of equipment; angle for recognition of anyone entering, not just motion detection.
- Fuel and chemical storage: keep standoff distance from tanks for safety, use tamper-resistant mounts, and avoid bright direct lighting that can wash out infrared performance at night.
- Gates and driveways: mount 8 to 10 feet high, angled slightly downward toward the approach path, timed to capture a vehicle before it reaches the gate control.
- Perimeter and fence lines: prioritize gaps, low points, and secondary entrances over long straight runs of fence; reserve thermal or long-range sensors for choke points where visibility is genuinely poor, since they add cost that is wasted on open, low-risk fence.
- Barn interiors and pens: use angled views for general activity monitoring and more top-down placement where you need to watch specific behavior, such as a calving pen, closely.
Pro Tip: Fuel storage and chemical sheds benefit from a camera and simple signage together: the camera gives you evidence, the sign gives you deterrence, and neither replaces the other.
The UNMC farm security guidance notes that many farmers report having experienced trespass or burglary, and recommends motion-activated cameras at approach points along with rotating camera locations during periods of intense seasonal activity.
Power, Connectivity, and Storage for Rural Sites
Power and backhaul decisions often matter more than camera selection on a farm, since the nearest outlet or router may be hundreds of feet away.
- Power-over-Ethernet (PoE) is the preferred option anywhere you can run Ethernet, since it carries both power and data on one cable and avoids battery maintenance.
- Solar plus battery setups make sense for remote gates, fence lines, or pastures far from any building.
- Standard AC power works fine for fixed barn or shed mounts already wired for electricity.
- Connectivity options include wired Ethernet for reliability, point-to-point wireless bridges for line-of-sight runs between buildings, Wi-Fi repeaters for shorter gaps, and cellular service where no other backhaul exists.
Storage strategy depends on how many cameras you run and how long you need footage retained. Edge storage (recording locally on the camera or an on-site NVR) keeps bandwidth needs low, while cloud storage adds cost and upload time but protects footage if equipment is stolen. An edge-computing livestock monitoring study found example deployments producing roughly 10.3 gigabytes per camera per day, which would require sustained bandwidth around 3.47 megabytes per second just to upload that single camera’s footage to the cloud within 24 hours.
That figure explains why farms running many cameras over limited rural internet often lean on edge storage with scheduled overnight transfers rather than continuous cloud upload. Beyond bandwidth, basic hardening still matters: change default passwords, keep recorders on a separate network segment if possible, and physically secure the NVR itself behind a locked panel.
Camera Specs and Settings That Actually Matter
Most farm camera shopping gets derailed by specs that sound impressive but do not change outcomes. A few genuinely do.
- Resolution and pixel density: match the camera to its DORI goal; IEC-based pixel density guidance recommends roughly 40 pixels across a target for identification, meaning a gate camera needs far more pixel density on the subject than a wide pasture-view camera.
- Lens choice: wider fields of view suit yards and lanes; longer focal lengths suit gates and loading areas where plate or face detail matters.
- Low-light and infrared performance: check how a camera performs in true darkness, not just dusk, and add dedicated lighting only where IR alone leaves faces or plates unreadable.
- Capture settings for animal monitoring: dairy time-lapse research from Iowa State Extension suggests frame rates around 10 FPS and capture intervals of 5 to 20 seconds depending on the monitoring goal, with higher mounting positions reducing both tampering risk and blind spots.
- Motion zones and sensitivity: tune detection zones to exclude swaying branches or livestock movement outside your actual area of concern to cut down on false alerts.
Three Layout Templates by Farm Size
These templates give a starting point you can adjust once your sketch and site survey are done.
- Small hobby farm (4 to 6 cameras): cover the main gate, one equipment shed, the house or primary barn entry, and one fence choke point; expect a blind spot along back fence lines unless you add a fifth or sixth camera there.
- Mid-sized mixed farm (8 to 16 cameras): mix PoE for buildings close to power with solar nodes for remote gates and pastures; plan for a local NVR with 30 to 60 days of retention depending on storage capacity.
- Large ranch: focus budget on choke points rather than full perimeter coverage, add PTZ cameras at hubs like main gates or loading areas, and reserve thermal cameras for long-range sightlines where visible-light cameras fall short at night; edge storage with scheduled transfers keeps bandwidth manageable across dozens of cameras.
Before calling an installer, prepare:
- Your annotated sketch with priority spots marked.
- A list of available power sources near each priority spot.
- Your retention expectations (how many days of footage you need to keep).
- Site access notes, including gate codes or livestock handling constraints for installation day.
What a Professional Site Survey Delivers
A paid site survey should produce more than a camera count. Expect an annotated site map, recommended camera types and exact mounting points, a power and backhaul plan matched to each location, and a retention or monitoring proposal tied to your actual risk areas.
- Ask what camera types and lenses are recommended for each spot and why.
- Ask whether power will be PoE, solar, or AC at each location, and who handles the wiring.
- Ask what footage retention period is included and what it costs to extend it.
- Ask whether ongoing maintenance or monitoring is bundled or billed separately.
We design and install custom surveillance systems, including NVRs, PTZ cameras, and remote monitoring, tailored to each property rather than selling a fixed package, and our site survey process is built around exactly these deliverables.
Connecting Cameras to Farm Management Technology
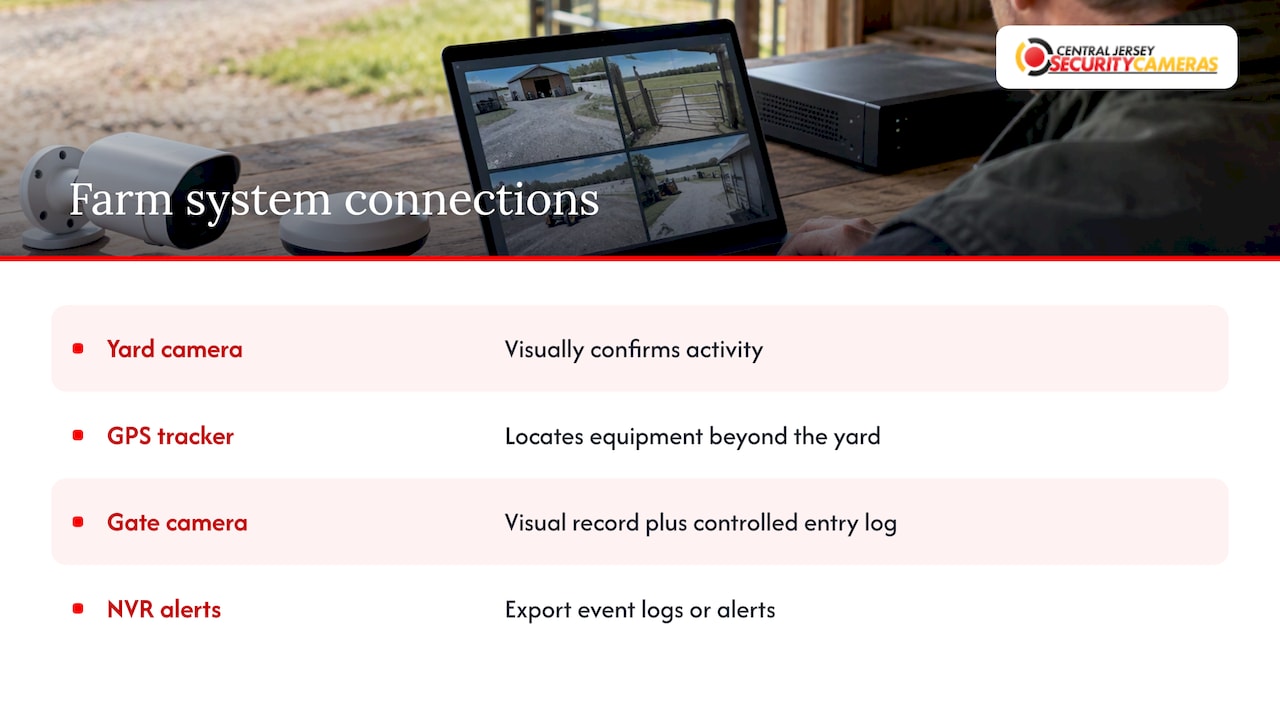
Cameras rarely operate in isolation on a working farm. Many operations already run GPS asset trackers on vehicles and equipment, geofenced alerts for high-value machinery, or basic access control on gates and shops, and a camera layout works best when it complements those systems rather than duplicating them. A camera covering the equipment yard gives you visual confirmation, while a GPS tracker on a tractor or trailer tells you where that asset is once it leaves the yard, which is useful if equipment theft is a particular concern given how often rural thefts involve vehicles or trailers rather than stationary targets. Resources like this guide to small equipment GPS tracking explain how geofencing and real-time location data pair naturally with a camera-based perimeter.
Access control integration matters too: a gate camera paired with a keypad or card reader gives you both a visual record and a controlled entry log, rather than relying on video alone to answer who came and went. If your farm already runs a management platform for herd records, irrigation, or equipment maintenance, check whether your NVR or camera system can export event logs or alerts into that platform, since many modern recorders support basic API or email-based notifications that save you from checking two separate systems every day.
Legal and Privacy Rules for Farm Cameras
Camera placement on a working farm is generally straightforward on your own property, but a few areas deserve caution. Avoid aiming cameras into neighboring homes, bedrooms, or bathrooms in any worker housing on site, since recording private spaces raises both legal and ethical problems regardless of local statute specifics. If workers or visitors regularly pass through areas under camera coverage, posting simple signage indicating recording is in progress is a reasonable practice even where it is not strictly required.
Audio recording carries separate and often stricter rules than video in many jurisdictions, so if your cameras capture audio, confirm whether consent requirements apply in your state before relying on that audio as evidence. Rules vary by state and locality, so when surveillance covers shared property lines, worker housing, or public-facing roads, it is worth confirming your specific obligations with a local attorney rather than assuming a general video surveillance rule covers every situation on a farm.
Keeping Farm Cameras Running Year After Year
Agricultural environments are harder on equipment than a typical suburban install. Dust from fieldwork, humidity near livestock housing, and temperature swings from summer heat to winter freezes all shorten the working life of cameras that are not rated or maintained properly.
Check housings and seals twice a year, ideally at the start of planting and harvest seasons, for dust buildup, cracked gaskets, or water intrusion around cable entries. Clean lenses regularly in dusty barn or feed areas, since a thin film of dust can quietly degrade image quality long before a camera fails outright. Inspect mounting hardware for rust or loosening, especially on cameras near livestock that may bump or rub against poles and brackets. Test battery and solar-powered units seasonally, since shorter winter daylight hours can leave solar setups undercharged just when you need reliable coverage most. Confirm NVR storage drives still have free space and that backup or cloud transfers are completing successfully rather than silently failing.
What Installers Learn the Hard Way
Good placement beats a bigger camera count almost every time. The most common mistake we see is a farm with a dozen cameras and still no clear shot of the one gate that actually matters, because cameras went up wherever was convenient rather than where coverage was weakest.
Overlapping sightlines, proper mounting height, and matching lens choice to the goal at each spot solve more problems than adding another camera ever will. Professional help pays off most on larger or irregular sites where terrain, power access, and seasonal blind spots make a sketch alone insufficient.
— Tom
Get a Custom Camera Layout for Your Property
Reading guides and templates gets you most of the way, but every farm has its own terrain, power access, and priority list, and a site visit catches blind spots a sketch alone will miss.
- We handle custom camera system design and installation, including NVRs, PTZ cameras, and license plate recognition for gates and loading areas.
- A one-time installation fee of $99 applies to new security camera installations.
- Ongoing alarm monitoring runs $24.95 to $29.95 per month for properties that want continuous monitored coverage alongside recorded video.
- Larger or irregular sites, properties needing plate capture, or anyone wanting a service contract rather than a one-time DIY setup tend to get the most value from a professional installer.
If your layout involves more than a handful of cameras, uneven terrain, or specific retention needs, our team can turn your sketch into an installation-ready plan backed by ongoing service and support.
FAQ
What is the best camera system for a farm?
The best setup combines coverage-first placement at priority spots (gates, sheds, fuel storage, livestock entries) with power and storage matched to your site’s layout, rather than any single camera model. Mixed systems using PoE near buildings and solar or cellular at remote gates typically perform best on working farms.
How do I construct a farm camera layout?
Start with a sketch of your property marking buildings, gates, fence lines, and approach routes, then assign each priority spot a detection, recognition, or identification goal before choosing lenses and mounting points. Walk the sketch at your highest-risk time of day to catch glare or blind spots before installing anything.
What is the best camera for a farm?
There is no single best camera; gates and sheds generally need narrower lenses with higher pixel density for identification, while open pasture areas do fine with wider lenses for basic detection. Pixel density guidance suggests roughly 40 pixels across a target when identification is the goal, which should guide lens and resolution choice at each spot.
Is there a free security camera layout planner available?
Some camera manufacturers and vendors offer free online lens and coverage calculators that let you sketch a property and preview field of view before buying equipment. For sites with several buildings or irregular terrain, pairing a free planner with a professional site survey still catches blind spots a flat drawing tool can miss.
Sources
- Farm and Ranch Security — Texas A&M AgriLife Extension
- Visual sensor placement optimization with 3D animation for cattle health monitoring in a confined operation — Animals (PMC)
- Computer vision on the edge: A computing framework for high-throughput phenotyping in livestock operations — PLF Tennessee
- The right settings and location for time-lapse cameras — Iowa State Extension
- Pixel density based on IEC 62676-4:2014 — Axis whitepaper