
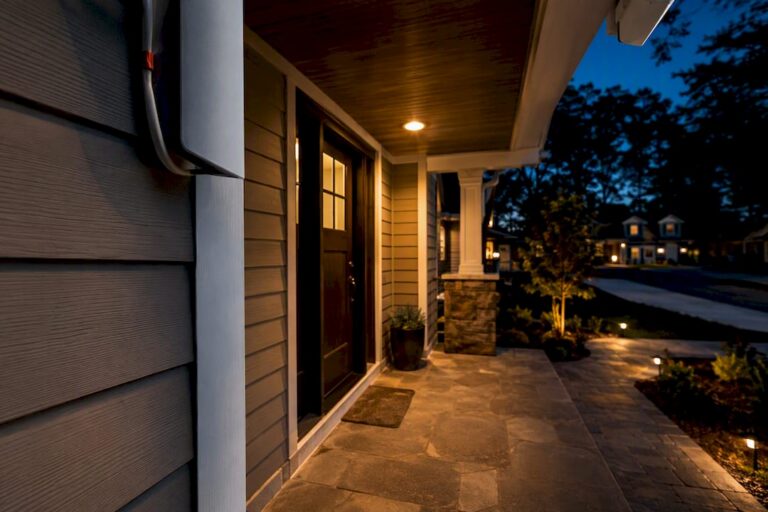
Cover your front door, driveway approach, one indoor chokepoint, and two opposing yard corners first. Clamp each camera in place and check the live feed before you drill a single hole.
TL;DR:
- Fully map chokepoints such as the front door, driveway, and indoor hallway before mounting cameras to ensure optimal placement and coverage.
- Mount outdoor cameras at 8 to 10 feet and indoor cameras at 7 to 9 feet to balance recognition ability with tamper resistance.
- Use a 15 to 30 degree downward tilt for most placements, with less tilt for long sightlines like driveways to maintain distant detail.
- Overlap fields of view between cameras by 10 to 20 percent to prevent gaps that intruders could exploit, especially at yard corners.
- Test camera placement with temporary clamps and live feeds at different times of day, confirming face or plate clarity before final installation.
Table of Contents
- Where Should Cameras Be Placed First? Priority Exterior Locations
- Which Indoor Cameras Matter Most for Coverage?
- What’s the Best Height and Angle for a Security Camera?
- How Does Lighting Affect Camera Placement?
- How Many Cameras Do You Actually Need for Full Coverage?
- How Do I Test Camera Placement Before Drilling?
- What Camera Placement Mistakes Should You Avoid?
- Installer’s Take: When a DIY Placement Plan Isn’t Enough
- What Are the Privacy Rules for Camera Placement?
- Should Cameras Connect to Your Alarm System?
- What Power Options Work Best for Security Cameras?
- Wireless or Wired: Which Placement Works Better?
- Where to Verify Placement Rules and Standards
- The Installer’s Honest Opinion on Camera Placement
- Sources
- FAQ
Where Should Cameras Be Placed First? Priority Exterior Locations
Every camera on your property should have exactly one job: identify a face, capture a plate, or watch a route. Trying to make one camera do all three usually means it does none of them well.
Front door. This is the single most important position on the house. CNET’s reporting on burglary entry patterns puts the front door at the top of the list for how intruders approach a home, and it’s also where deliveries, guests, and package thieves all show up. The best setup isn’t one camera trying to do everything. It’s two: a doorbell camera mounted at typical chest-to-face height for close-range face capture, plus an overhead camera near head height to catch the full approach. Placement research on entry-point coverage backs this two-device combination specifically because it solves the tension between “close enough to see a face” and “wide enough to see the whole porch.”
Driveway. Plate capture is unforgiving about geometry. Mount the camera so its field of view runs lengthwise along the driveway rather than across it, at a height around 9 to 10 feet. If the drive is longer than roughly 30 feet, a fixed wide lens won’t hold enough detail on a plate at that distance. Switch to a varifocal lens or lean on a higher resolution to pack in the pixels-per-foot a plate read actually needs.
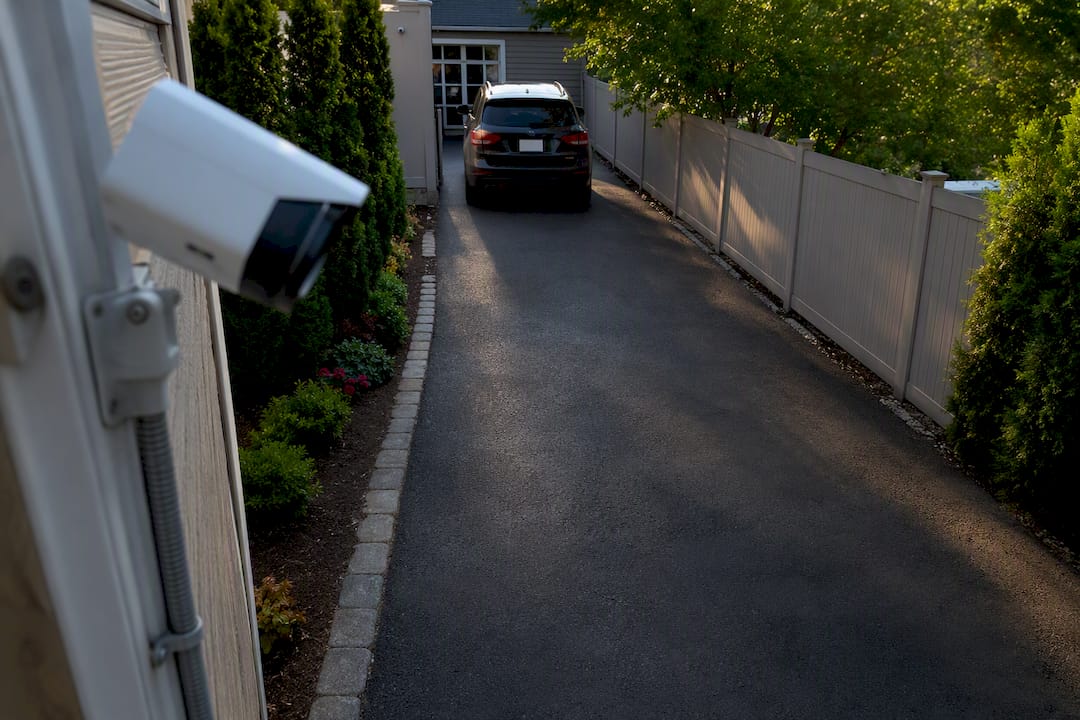
Yard corners. Two cameras mounted on opposite corners of the house, angled inward, overlapping to cover side yards or fence lines., will cover more usable ground than four cameras scattered without a plan. The overlap where their fields of view cross is exactly where you want it, since that’s usually the side yard or fence line where someone would try to cut through unseen.
Garage and side gates. These are the routes people forget until after a break-in. A garage side door and any side gate leading to the backyard are classic forced-entry points precisely because they’re out of view from the street.
Before mounting anything permanently, run through this quick checklist:
- Confirm nothing (a tree branch, a gutter, a parked car) will grow into or block the line of sight.
- Check that the mounting point isn’t directly under a soffit light, which bounces infrared straight back into the lens at night.
- Walk the actual path a visitor or intruder would take and see if the camera catches a usable face shot, not just a moving blob.
- Verify the mount is out of easy arm’s reach to resist tampering.
Which Indoor Cameras Matter Most for Coverage?
Outdoor cameras tell you someone approached. Indoor cameras tell you what happened after they got past the front line, which is why chokepoints matter more indoors than blanket coverage does.
- Top of the stairs and the main hallway are the two spots almost every household should cover first, since nearly all indoor foot traffic funnels through one of them.
- Living room corners work better than wall centers for a simple reason: a corner mount sees two walls at once and cuts the blind spots roughly in half compared to a flat wall placement.
- Mounting height indoors runs lower than outside, typically 7 to 9 feet, since you’re not fighting the same tamper-access concerns you have at street level.
- Avoid pointing any indoor camera through a window or glass door. Glass creates reflections and IR bounce at night that can wash out or completely blind the shot.
- Skip bedrooms and bathrooms entirely. Indoor coverage should focus on shared spaces and points of passage, not private rooms, for reasons that go beyond just picture quality.
Indoor and outdoor cameras aren’t competing systems. They’re a relay. The outdoor camera identifies the approach; the indoor camera at the chokepoint confirms who made it inside and which direction they went. Skip the indoor half and you’ve got half a case if something ever happens.
What’s the Best Height and Angle for a Security Camera?
Height and lens choice aren’t separate decisions. They’re the same decision, because the job you’re assigning a camera determines both.
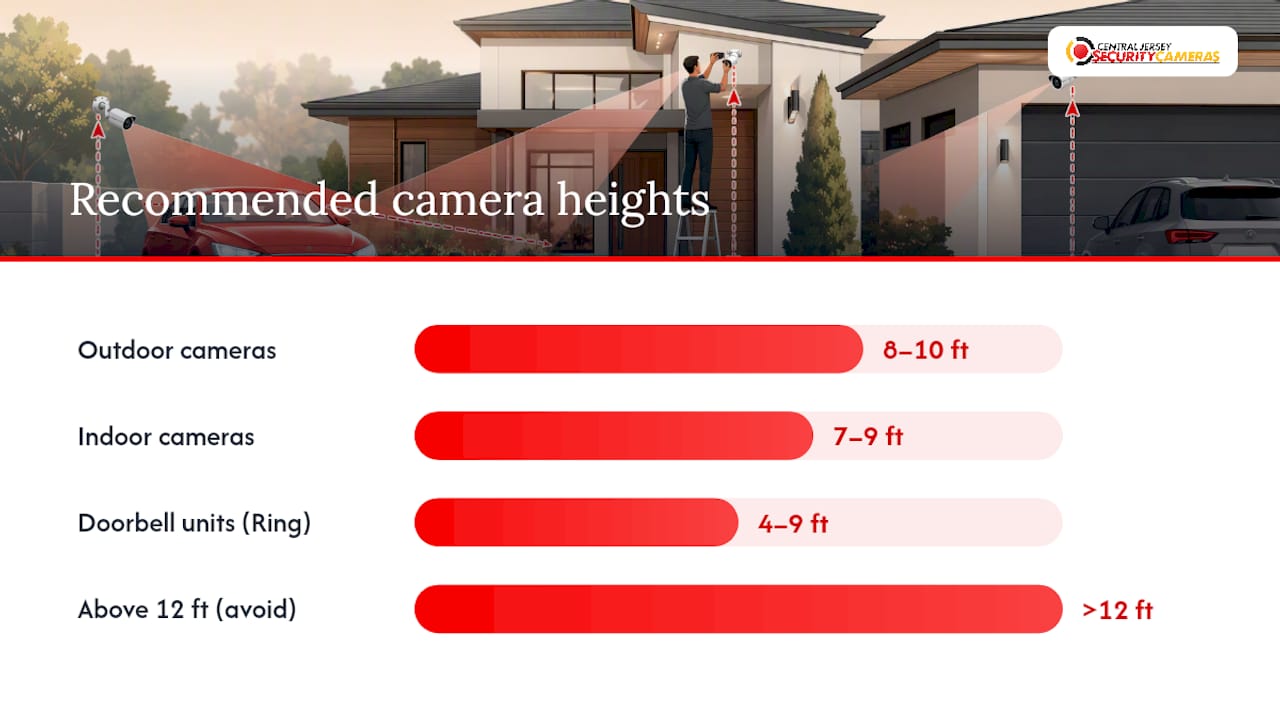
Outdoor cameras belong at 8 to 10 feet, and indoor cameras at 7 to 9 feet, a range placement standards from CCTV planning guides settle on for a reason: it’s high enough to resist casual tampering but still low enough to catch a recognizable face rather than the top of someone’s hood. Consumer device makers land in a similar zone. Ring’s own placement guidance recommends 4 to 9 feet for doorbell units and 7 to 9 feet for indoor cameras, which lines up closely with the professional range.
Go past 12 feet and you’re trading identification for a wider, more cinematic view that looks great in a demo and useless in a police report. Faces become unreadable ovals at that height, no matter how good the sensor is.
Tilt matters just as much as height:
- 15 to 30 degrees downward works for most standard placements, front doors, garages, side entries.
- Less tilt, closer to flat, on cameras watching a long sightline like a driveway or a property perimeter, where you need distance more than close detail.
Lens selection follows the same logic:
- 2.8 to 3.6mm lenses suit wide-area coverage, yard corners, general activity monitoring.
- 4mm or a varifocal lens suits anything that needs identification detail at range, driveways, gates, plate capture.
Pixel density is the number that actually decides whether a plate is readable, not resolution alone. A 4K sensor pointed at a lens too wide for the distance still produces a blurry plate. Driveway-specific placement guidance notes that pairing a longer lens with 4K resolution is what closes the gap at distances beyond 30 feet, since the extra pixels only help once the lens is framing the plate tightly enough to use them.
Pro Tip: If you only upgrade one camera to 4K, make it the driveway camera. Face capture at the front door works fine at 1080p from a reasonable distance; plate capture almost never does.
How Does Lighting Affect Camera Placement?
A camera with a perfect field of view is worthless if the picture is a black silhouette against a bright porch light. Lighting problems cause more unusable footage than bad angles do.
Backlighting is the most common failure. Point a camera toward a rising or setting sun, or toward a bright streetlight behind the subject, and you get a dark shape with no facial detail. Guidance on high-contrast entrances recommends Wide Dynamic Range, WDR, cameras for exactly this scenario, since WDR balances the exposure between the bright background and the darker foreground subject instead of blowing one out to save the other.
Infrared glare shows up when a camera sits too close to a soffit light or a reflective surface, and the camera’s own IR illuminator bounces straight back into its sensor as a white blob. A standoff mounting bracket, or simply relocating the camera a foot or two away from the light source, usually fixes it.
- Add a dedicated spotlight or floodlight near yard corners for both deterrence and better color detail after dark.
- Consider a color night vision camera for the driveway or front door, since a description like “dark jacket” beats a grayscale blob every time.
- Check the camera’s operating temperature rating before mounting it somewhere that hits extreme summer heat or winter cold; cheaper units can fail outside their rated range.
- Use a mount cover or housing rated for direct rain and snow exposure on anything facing open sky.
None of this is exotic engineering. It’s the difference between footage you can hand to police and footage that’s technically “recorded” but useless.
How Many Cameras Do You Actually Need for Full Coverage?
Coverage planning comes down to one repeatable process, and it works whether you’re covering a three-bedroom colonial or a small retail storefront.
- Map the approach routes. Walk the property and trace every path someone could use to reach a door, window, or gate. This is your risk map, and it’s the single most useful ten minutes you’ll spend on this project.
- Mark the chokepoints. Front door, driveway entrance, side gate, garage door. These get cameras before anything else does.
- Assign each camera one job. Identification, area detection, or deterrence. A camera trying to do all three usually does none well.
- Overlap adjacent fields of view by 10 to 20%. Installer-level planning guidance treats this overlap rule as standard practice specifically because a gap between two cameras is an invitation, and a determined intruder will find it.
- Scale the count to the property. A small home typically needs 3 to 4 cameras. A typical single-family lot runs 4 to 6. Larger properties, or ones with multiple buildings, usually need a specialty camera, like a PTZ unit that can pan and zoom on demand, added to the fixed-camera base rather than replacing it.
A PTZ camera earns its cost on large open areas, like a warehouse yard or a commercial parking lot, where one operator or automated tour can cover ground that would otherwise need three or four fixed units.
How Do I Test Camera Placement Before Drilling?
Skip the test phase and you’re gambling that your eyeball estimate of “that looks about right” survives contact with real foot traffic and real sunlight. It usually doesn’t.
- Clamp the camera temporarily at your intended mounting spot using a spring clamp or a painter’s pole, and pull up the live view on your phone.
- Walk the actual approach path at a normal pace, not a slow test-walk, to confirm the camera catches a usable face or plate shot at real-world speed. Testing guidance from home security planning resources treats this walk-through as the step that catches more placement failures than any other single check.
- Repeat the test at night and during peak midday sun, since a camera that looks great at 3 p.m. can be a silhouette machine at 7 p.m. once the sun drops behind it.
- Tune motion zones and sensitivity thresholds once you can see what the camera actually picks up, cars passing on the street, a neighbor’s cat, tree branches in wind.
- Confirm network reach and power before finalizing the spot. A Power over Ethernet, PoE, camera needs a cable run that can actually reach a switch or NVR; a Wi-Fi camera needs a signal strong enough to hold a stream at that distance from the router.
Pro Tip: Take a screenshot from the clamped test position at night, then compare it against the daytime shot. If you can’t make out a face in either one, move the camera before you mount it, not after.
What Camera Placement Mistakes Should You Avoid?
Most placement failures repeat the same handful of errors, and every one of them has a fast fix.
- Mounted too high. A camera at 14 or 15 feet looks impressive but captures the top of heads instead of faces. Lower it into the 8 to 10 foot range, or add a second, closer camera dedicated to identification.
- Shooting through glass. A camera aimed out a window or through a storm door picks up reflections and IR bounce at night. Move it outside the glass entirely, even if that means a slightly less convenient mounting spot.
- Backlit by a porch light or the sun. Reposition the angle so the light source is behind the camera, not behind the subject, or switch to a WDR-capable unit.
- No overlap between adjacent cameras. Gaps between fields of view are exactly where a careful intruder will walk. Remap the yard corners and adjust angles until the coverage actually meets in the middle.
- Easy to reach and easy to knock down. A camera mounted at head height with no tamper-resistant hardware invites exactly the kind of interference it’s supposed to catch on video.
Installer’s Take: When a DIY Placement Plan Isn’t Enough
A single-story home with clear sightlines is a reasonable DIY project. A multi-story property, a commercial building with several chokepoints, or any site that needs reliable plate capture is a different animal, and that’s usually where a professional site assessment pays for itself.
A proper assessment from an installer typically covers:
- A full risk map of the property, not just the obvious front-door approach.
- A camera-by-camera placement plan matched to each location’s actual job.
- Cable routing that accounts for multi-story wiring challenges and network closet placement.
- Mounting hardware selected for tamper resistance and the specific weather exposure at each point.
- A maintenance plan so lenses, firmware, and storage get checked instead of forgotten.
Complex network integration, multiple building coverage, and license-plate-grade lens selection are the three signals that it’s time to call someone instead of guessing. Central Jersey Security Cameras handles exactly this kind of commercial site assessment throughout Central New Jersey, and the same planning process scales down cleanly for a single home with an unusually tricky layout.
What Are the Privacy Rules for Camera Placement?
Camera placement isn’t only a technical problem. It’s a legal one the moment your lens crosses a property line.
Point a camera at your own porch, driveway, or yard, and you’re almost always on solid ground. Point it at a neighbor’s window, their backyard, or any space where they’d reasonably expect privacy, and you’re inviting a dispute or worse. The general principle across most jurisdictions is that recording your own property is fine; recording someone else’s private space without consent usually isn’t. Rules do vary by state and municipality, so check your local ordinances if a camera’s field of view will reach beyond your own lot line.
Audio recording carries its own layer of rules separate from video, and several states require consent from at least one party before you can legally record a conversation. If a camera also records audio, that’s worth confirming before you rely on it for anything beyond silent video.
For a small business, visible signage near entrances isn’t just good practice, it also reduces disputes about whether customers or employees knew they were being recorded. Guidance on privacy signage placement covers what to post and where, which applies just as well to a retail entrance or office lobby as it does to a medical waiting room.
Indoor cameras carry the sharpest privacy line of all. Bedrooms, bathrooms, and any space where an employee or family member has a reasonable expectation of privacy should stay off the coverage map entirely, no matter how convenient the angle looks.
Should Cameras Connect to Your Alarm System?
A camera that only records is a witness. A camera tied into your alarm system is a first responder.
The most useful integration pairs motion-triggered recording with your alarm panel, so a triggered zone automatically pulls up the matching camera feed instead of leaving you to guess which door got opened. Many modern systems also support two-way integration: an alarm event can trigger a camera to start recording at higher quality or send an instant push alert with a snapshot attached, rather than a generic text that just says “motion detected.”
Smart home platforms extend this further. Door and window sensors, smart locks, and lighting controls can all trigger camera behavior, a smart lock unlocking can flip a nearby camera to record, or a motion sensor in the yard can trigger a floodlight and a camera clip at the same moment. The practical upside is fewer false alerts and more context around every real one, since you’re not relying on a single sensor’s judgment call.
None of this replaces good placement. An alarm-integrated camera aimed at the wrong angle still produces useless footage; integration makes a well-placed camera more useful, not a poorly placed one less bad.
What Power Options Work Best for Security Cameras?
Power is usually the deciding factor in where a camera actually ends up, more often than the ideal angle.
Power over Ethernet (PoE) runs power and data over a single cable, which simplifies installation at any spot within cable-run distance of a switch or NVR. It’s the standard choice for wired systems because one cable does the whole job, and PoE cameras don’t depend on Wi-Fi signal strength holding up at the edge of the property.
Battery-powered cameras solve the placement problem for spots with no easy wiring, a detached shed, a far gate, a fence line camera. The tradeoff is periodic recharging or battery swaps, and battery drain accelerates in cold weather, which matters if the camera sits somewhere hard to reach in January.
Solar-powered units solve the battery-maintenance problem for exactly those hard-to-reach or off-grid spots, provided the mounting location gets consistent sun exposure. Solar camera installation is worth considering for any location where running a cable isn’t practical and battery swaps would be a hassle.
For cable management on wired runs, keep a few things in mind: route cable through conduit wherever it’s exposed to weather or foot traffic, leave a service loop of slack near the camera end for future adjustments, and label every run at the panel end before you close up walls or ceilings. A messy, unlabeled cable closet turns a five-minute troubleshooting job into an afternoon.
Wireless or Wired: Which Placement Works Better?
The power question and the wireless-versus-wired question are really the same decision viewed from two angles.
Wired systems win on reliability. A PoE camera doesn’t drop frames because a neighbor’s Wi-Fi network crowded the airwaves, and it doesn’t lose connection during a storm the way a Wi-Fi camera can if the router itself loses power. For any chokepoint you’re depending on for identification, a driveway plate camera, a front-door camera, wired is the safer default specifically because the footage has to be there when you need it.
Wireless systems win on placement flexibility. A camera watching a back fence line or a detached garage with no existing cable run can go up in an afternoon instead of requiring a full cable pull through walls or under a driveway. The tradeoff is a dependency on signal strength and battery life, both of which degrade with distance and weather.
A hybrid approach is usually the smartest plan for a full property: wire the highest-priority chokepoints, front door, driveway, garage, and go wireless for secondary spots where flexibility matters more than absolute reliability. That’s also the setup most professional installers default to, since it puts the reliable option where the stakes are highest and saves the flexible option for the spots that can tolerate an occasional dropped frame.
Where to Verify Placement Rules and Standards
A few sources are worth bookmarking if you want to double-check any number in this guide or dig deeper into a specific placement problem.
- CCTV Planner’s placement guide covers mounting height and overlap math in more technical detail.
- Ring’s device placement tips offer a consumer-tested reference for doorbell and indoor camera distances.
- Rekobyte’s home placement walkthrough is a good resource for the temporary-mount testing process before you drill.
- For a hands-on look at hardware options, Central Jersey Security Cameras’ equipment pages show real mounted examples across camera types.
The Installer’s Honest Opinion on Camera Placement
Most placement advice online overweights the camera and underweights the job. People buy a 4K camera expecting it to solve a plate-capture problem that was actually a lens and distance problem, then wonder why the footage still looks soft. The camera was never the bottleneck. The angle and the lens choice were.
The overlap rule is the single most skipped step, and it’s the one that costs people the most. Everyone remembers to cover the front door. That’s not a hardware failure. It’s a planning failure, and it’s completely avoidable with a five-minute walk around the property before anything gets mounted.
Here’s what I’d tell any homeowner starting from zero: map your chokepoints before you buy a single camera. Test every placement with a clamp and a live feed before you drill. And if your property has more than one story, a driveway longer than a typical suburban lot, or a commercial chokepoint that actually matters for liability, get a professional assessment.
— Tom
Sources
- CCTV Planner — Camera placement guide
- Security Camera Placement Guide 2026: Where to Mount for Best Coverage
- Where to Put Surveillance Cameras: A Strategic Guide for Property Protection – Overton Security Services
- Where to Place Security Cameras Around Your Home — Rekobyte
- CNET — The 6 best places to install your security camera (and what to avoid)
FAQ
Where Should Security Cameras Be Placed First?
Start with your front door, driveway approach, one indoor chokepoint like a stairway or main hallway, and two opposing yard corners. These positions cover the routes most people actually use to approach or enter a property.
What Is the Best Height for a Security Camera?
Mount outdoor cameras 8 to 10 feet high and indoor cameras 7 to 9 feet. Going above 12 feet trades away the face detail you need for identification in exchange for a wider view that looks impressive but is hard to use in practice.
What Angle Should a Security Camera Be Tilted At?
Most placements work best with a 15 to 30 degree downward tilt. Cameras watching a long sightline, like a driveway or property perimeter, need less tilt to keep the distant approach in frame.
Is There a Free Tool to Plan Camera Placement?
Several installer and industry sites publish free camera placement guides and planning checklists you can use to map chokepoints and overlap before buying equipment; a physical walk of the property with a tape measure and a notepad works just as well for most homes.
How Do I Test My Camera Placement Before Mounting It?
Clamp the camera temporarily at the intended spot and check the live feed on your phone, then walk the approach path at a normal pace to confirm you get a usable face or plate shot. Repeat the test at night and during bright midday sun before committing to permanent mounting.