Desktop Software / LTS Security / NVMS

Custom Views and Auto-Switch in NVMS V3

Save camera arrangements and rotate through cameras or saved views in NVMS V3.

Save an arrangement

  1. Use the plus control beside Custom View.
  2. Choose a window division and place the desired cameras in the windows.
  3. Select the disk/save control, name the view and save.
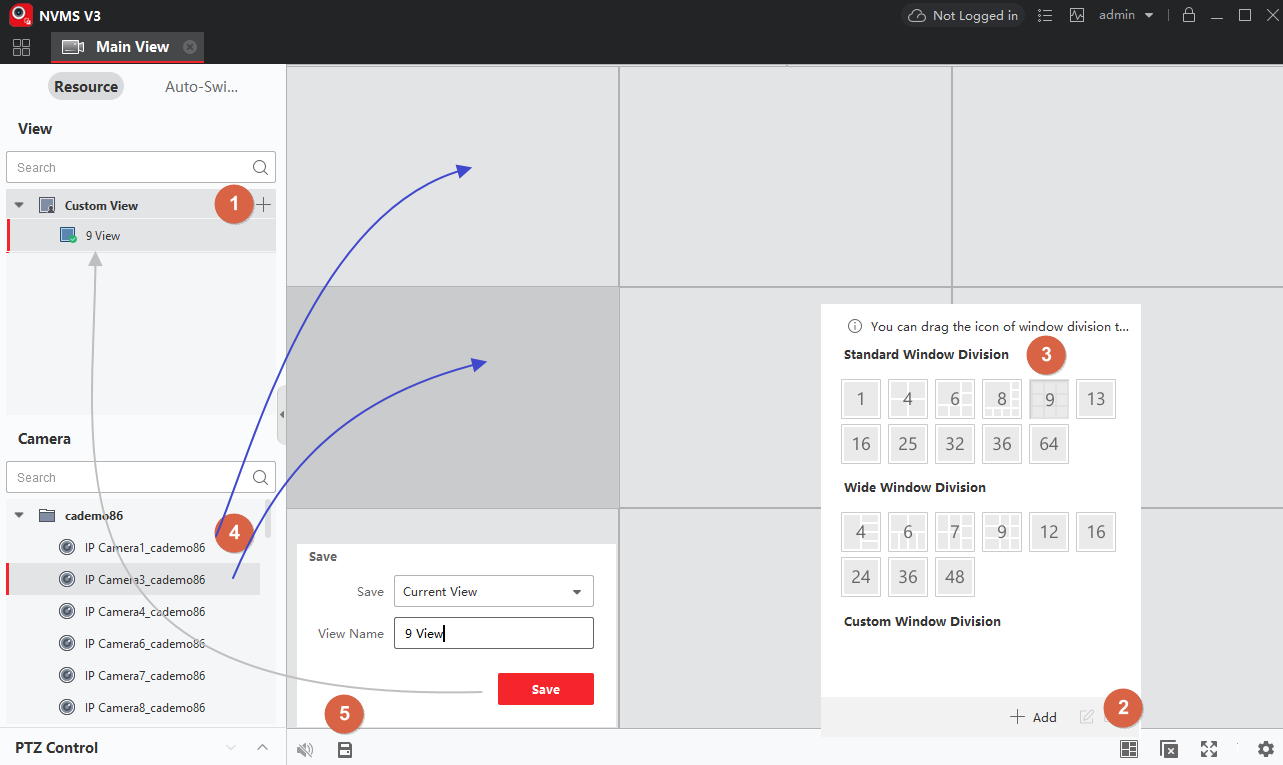
NVMS V3: create a Custom View, choose the layout, drag in cameras, then save.
NVMS V3: create a Custom View, choose the layout, drag in cameras, then save. Screenshot: LTS. Click the image to enlarge.

Choose how to rotate

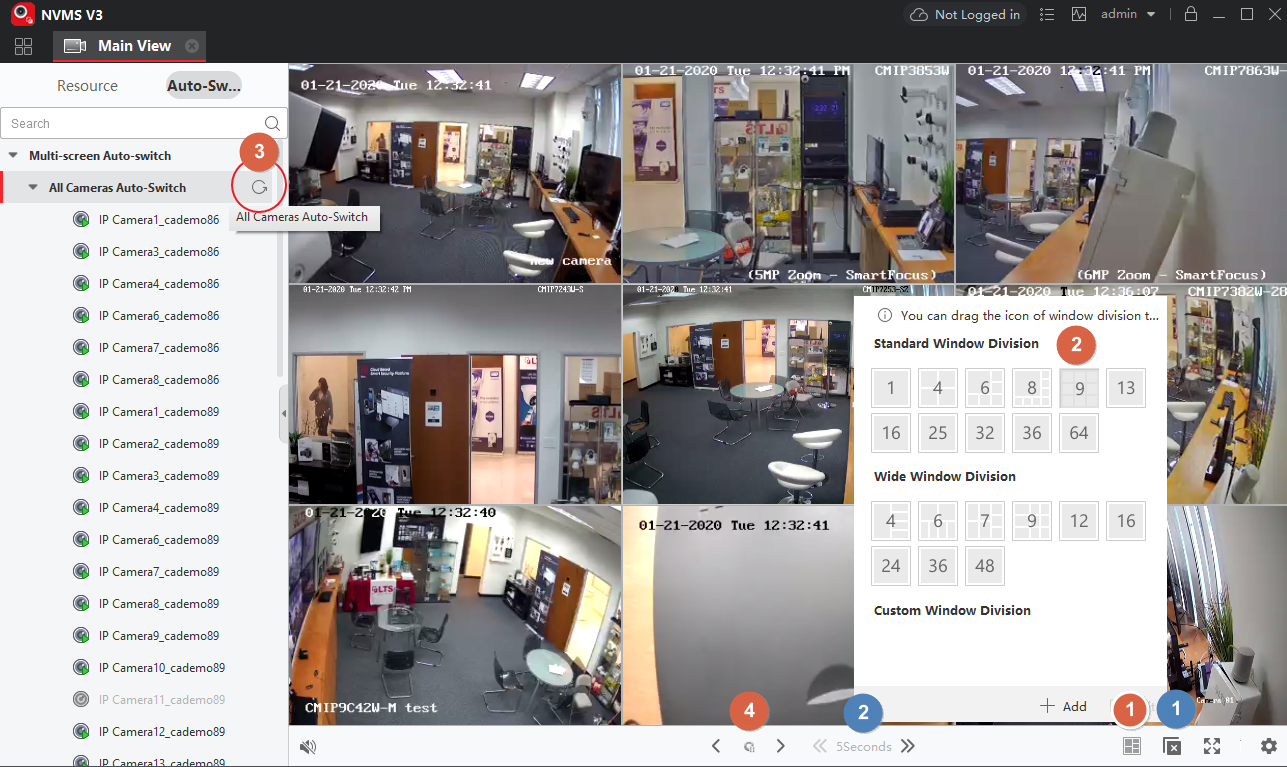
Single-screen switching cycles one picture. Multi-screen switching can rotate through all cameras, all custom views, or selected views in a view group.

  1. Choose the layout or saved views first. View switching requires at least two saved views.
  2. Start auto-switch with its switch control.
  3. Use pause/resume when you need to inspect a picture.
  4. To change the interval, stop switching, adjust the duration, then start again.
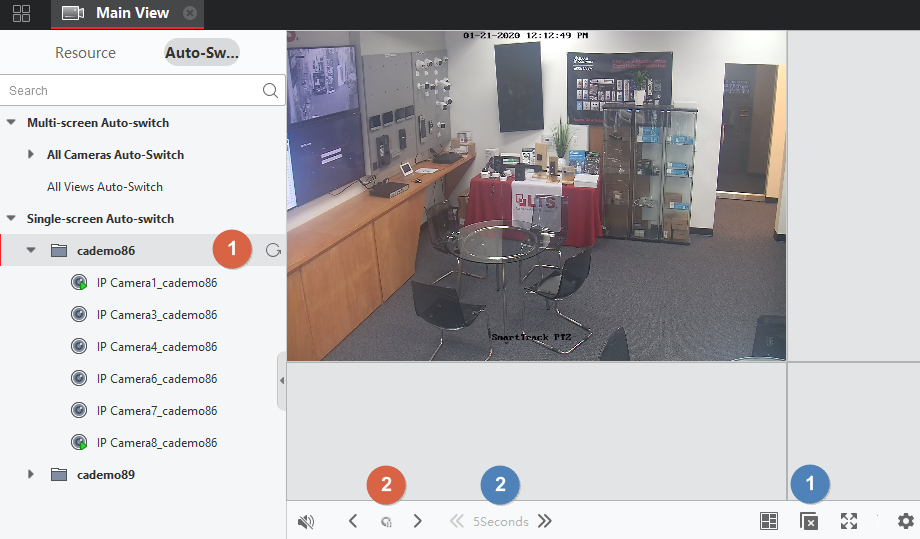
NVMS V3 single-screen auto-switch controls. The original callouts identify start/pause and interval settings.
NVMS V3 single-screen auto-switch controls. The original callouts identify start/pause and interval settings. Screenshot: LTS. Click the image to enlarge.
NVMS V3 multi-screen auto-switch: layout, switching and interval controls.
NVMS V3 multi-screen auto-switch: layout, switching and interval controls. Screenshot: LTS. Click the image to enlarge.

To limit rotation to selected views, add a view group, give it a name, choose the views, and confirm.
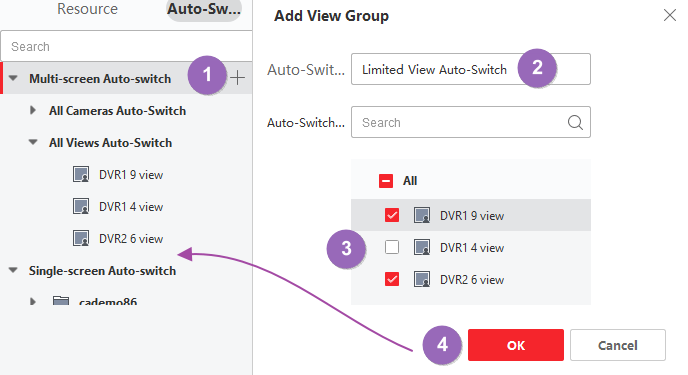
NVMS V3: choose the saved views to include in a view group.
NVMS V3: choose the saved views to include in a view group. Screenshot: LTS. Click the image to enlarge.

Source and version

Reconstructed in CJSC’s own wording from the archived LTS instructions. Menu names can differ between releases.

Need More Help?

Send us a technical support request for one-on-one help with your system.